
Noxudol
One of the biggest problems facing owners of classic and modern Volkswagens is creeping rust. Two things are required for rust to start, water and oxygen. There’s no way of stopping oxygen but you can help prevent water or moisture in the air getting to metal surfaces. There are various products on the market, but recently we have started using Noxudol.
This probably isn’t a brand name you’ve heard of before as traditionally these products were only available to vehicle manufacturers. Now on the retail market we were particularly interested in the range of solvent free products offered. Developed in conjunction with Volvo this environmentally friendly product gives an emission free work environment and an odour free vehicle after the wax has been applied.
We had recently acquired a 1970 Westfalia Bay Window for this year’s Win a Camper competition that had undergone a sympathetic restoration, unfortunately although the van had been fully repainted it had not been rust protected. This gave us the perfect opportunity to trial Noxudol 700 cavity wax and Noxudol 300 under body wax.
The theory is very simple by coating the inner structure or underbody with a layer of wax thus preventing moisture to make contact and in turn stopping rust from forming.
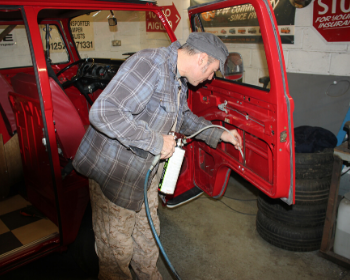
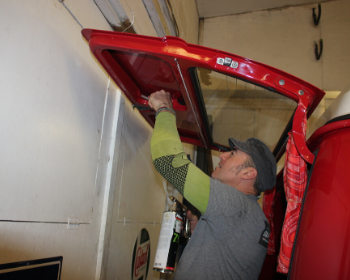
Before starting we would recommend pressure washing the underside of your vehicle a couple of days before hand then if possible, store it inside allowing it to be dry and free from moisture. We started by removing the interior trim panels from both cab doors, the tailgate and sliding door.

With the door panels removed we cleaned out any dust or debris from the bottom of the doors and checked to see if they were dry.

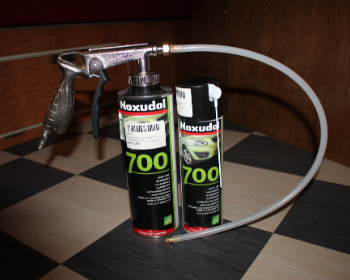
For the internal panels we used Noxudol 700 cavity wax as this offers good penetration and more creepage into cavities and joints over conventional treatments. This is available in cans J43447 for use with low pressure spraying and requires compressed air and a Schultz gun but can also be brushed on. We also stock an aerosol version J43446 that is ideal for home DIY use.
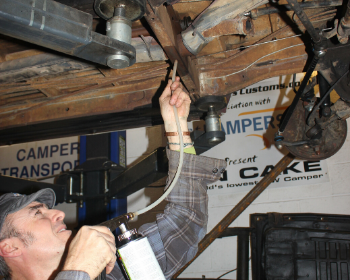
Using a probe on the Schutz gun we then applied a thin layer of wax to all the internal surfaces that we could access, taking advantage of any factory holes to get to the inner structure.
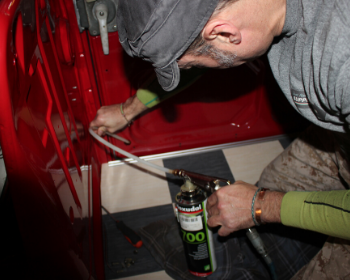
The wax is clear so it’s hard to see in the pictures but once done we repeated the process several times building up layers of wax and ensuring maximum coverage.
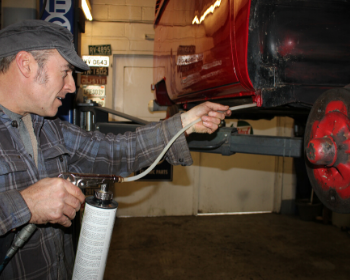
In a couple of areas, the probe was too large to access, so we turned to the aerosol as it’s supplied with a handy straw that was easier to use.

With the van on the ramp we treated the internal surfaces of the outriggers / jacking points and all the crossmembers, inner and outer sills etc wherever we could gain access. Where we could we pushed the probe in as far as possible then slowly drew this back as we sprayed the wax ensuring as much coverage as possible.

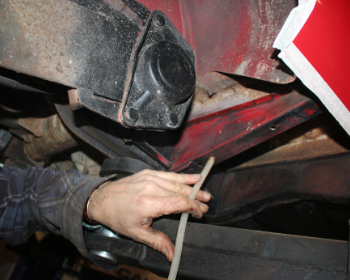
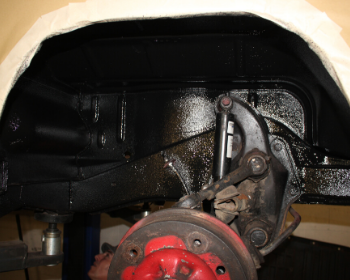
With this completed we then turned to the underside. Our van was a Texas import so was solid underneath but had a light coating of rust / dust and the odd termite nest. We cleaned the underside with a wire brush but also found a stiff hand brush handy for this. Any areas of oil or grease on the underside were cleaned using Renox degreaser J43469

To protect the paint work and prevent any overspray contaminating the finish we masked the sides of the van and sheeted over the top. This may be a little over the top, at the least we would recommend masking the lower edges of the sills etc. If you’re careful you should be OK, if you do get wax on the paint work it can be easily cleaned off with white spirit.

For the underside we were using Noxudol 700, as with the cavity wax, this is water and moisture repellent and offers good protection against de – icing salt used on the roads in winter. This is also available in a can J43449 or aerosol J43446. We used a Schultz gun this time fitted with a spray nozzle.

The underside of the van was sprayed taking care not to cover any mechanical components, for critical areas where overspray will cover certain parts you can decant the coating out and apply with a brush.

All areas were covered including under the wheel arches; as with the cavity wax it is recommended to apply several thin layers rather than a thick heavy coating.
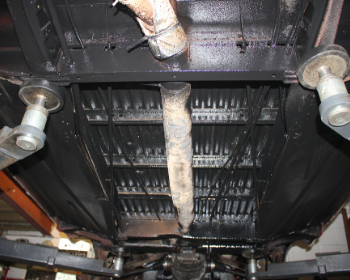
Once done the van was unmasked, as we used the solvent free products the drying period starts 24 hours after application and depending on thickness of coverage and temperature this can take 3 to 7 days to fully dry. The van won’t be used until fully dry.
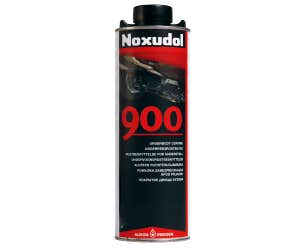
If you need a quicker dry time, we recommend using Noxudol 900 J43455 or J43456 as this can be used immediately after application.