
As my 70 Bay was running fine apart from the bodywork wanting a little attention, I fancied a project I could get stuck into. Over the years JK has had a few T25s as works vans, I always enjoyed driving them but had never personally owned one so my thoughts turned to what I could do with one.
For no real reason, the criteria I set for what I wanted was fairly strict. I decided on an uncut panel van, it had to be petrol preferably white ideally a double sliding door and if I could find one air-cooled.
After several months of following false leads, checking various for sales pages and forums, one Friday evening an advert caught my eye on eBay. I was pretty sure I'd seen this van advertised and sold some time in the past. I rang the number on the advert to the surprise of the person on the other end of the phone. He didn’t know his van was for sale it was stored at his mother’s and unknown to him she had relisted it as she wanted it out of her garden. He said he was busy, and could he phone me back later.
Later turned out to be lunchtime on Saturday I didn’t think he was going to call. He explained he didn’t want to sell the van, but other priorities had meant he hadn’t used it for over 4 years it was stood in his mum’s garden. He had sold it a few months earlier on eBay but the buyer had messed about on collection and paying so he had decided to keep it and get it back on the road. As it had been re-advertised, he agreed to let me come to have a look, but he was undecided to sell or not.
Early Sunday morning I hooked up the JK trailer and headed off for a couple of hours drive to Kent. On arrival, I found more or less as described a 1985 Panel Van, 1900cc, 5 speed in white. The seller had told me it was rust free apart from the front panel and ran beautifully. Unfortunately, he couldn’t get it to start. I had brought a fresh battery and petrol asking if there was fuel in it, he assured me he had put some in earlier. He had already removed the air filter, so we poured a little petrol in the carb, turned the key and it fired into life. I wasn’t overjoyed as there were plumes of smoke and the tappets sounded worse than an out of tune steel band, it soon died when the fuel ran out. Several more attempts we could only get it to run by tipping fuel in the carb. I looked around the van it was basically solid the cab floors had small holes the passenger front step was repaired with sheet aluminium and filler, both rear arches were holed with rust, but the inner and outer sills were good, and the dreaded seam rust hadn’t got hold yet.
I tried haggling on the price pointing out all the issues and that it didn’t run but the owner wouldn’t budge telling me that he had so many phone calls and messages that he had pulled the advert of eBay and that he didn’t really want to sell he was just honouring the advert his mum had placed. I guess deep down I knew the van would be OK, so I agreed on the asking price and loaded it on to the trailer. The previous owners Mum then came out of the house and told me she would miss seeing the van parked in the garden!

Once back at JK before unloading I pressure washed the layer of grime, mould and green slime of the bodywork and all the grass cuttings and weeds that had wrapped themselves around the underside and suspension. This straight away made it look 100% better once off the trailer I left the van ready for me to look at on Monday.

Monday lunchtime the first thing to do was get the van running properly to ascertain if the engine and gearbox were all OK. Cranking the engine over no fuel appeared so I decided to replace the fuel pump J10391 and push rod J10395 I also replaced the fuel hose from pump to carburettor with our hose J10583 as this is compatible with E15 and BioFuel mix. Annoyingly the engine still wouldn’t run without the aid of tipping fuel down the carb.

Tuesday lunchtime back out to the workshop, logic said to start with the basics, so I crawled underneath to find to my horror that the fuel line from the tank had been made up of several pieces including what I suspect was narrow bore vacuum hose. I removed the end from the tank to my surprise no fuel came out. It then occurred to me that the previous owner had claimed to put fuel in but there was only one key on the keyring so no way of getting the locking petrol cap off. Once I had a new cap J10335 I forced the old one off ready to fill up with petrol. Back under the van, I changed the fuel line and filter J10791 along with all new clips J12965 fresh fuel in the tank a small amount poured in the carb to prime it the van roared into life and this time settled down to a lumpy idle still smoking badly and sounding like it had a death rattle. I only let it run for a minute as I had noticed the water level was non-existent in the reservoir tank.
Wednesday lunchtime I turned the key and the van started so I drove it forward and backwards to check the gears and see how the brakes felt then drove it into the JK workshop. Once on the ramp, the first thing to do was drain the oil and give the engine a full service using our kit J41202. With new plugs, leads cap etc fitted the engine ran a lot smoother although the tappets were still noisy, and the smoke was starting to worry me.

The exhaust system was badly corroded and held together with wire so over the next couple of lunchtimes I battled removing the old system. I was very lucky with this as all the head studs came undone possibly due to soaking in Noxudol penetrating oil J43468 beforehand. One stud came out of the cylinder head this I replaced with a new one J10560. With the exhaust system, I decided to change to the earlier pipework, J12019 and J10324. This may sound an odd thing to do but I wanted to fit our Stainless Steel 4 into 1 system J31194.
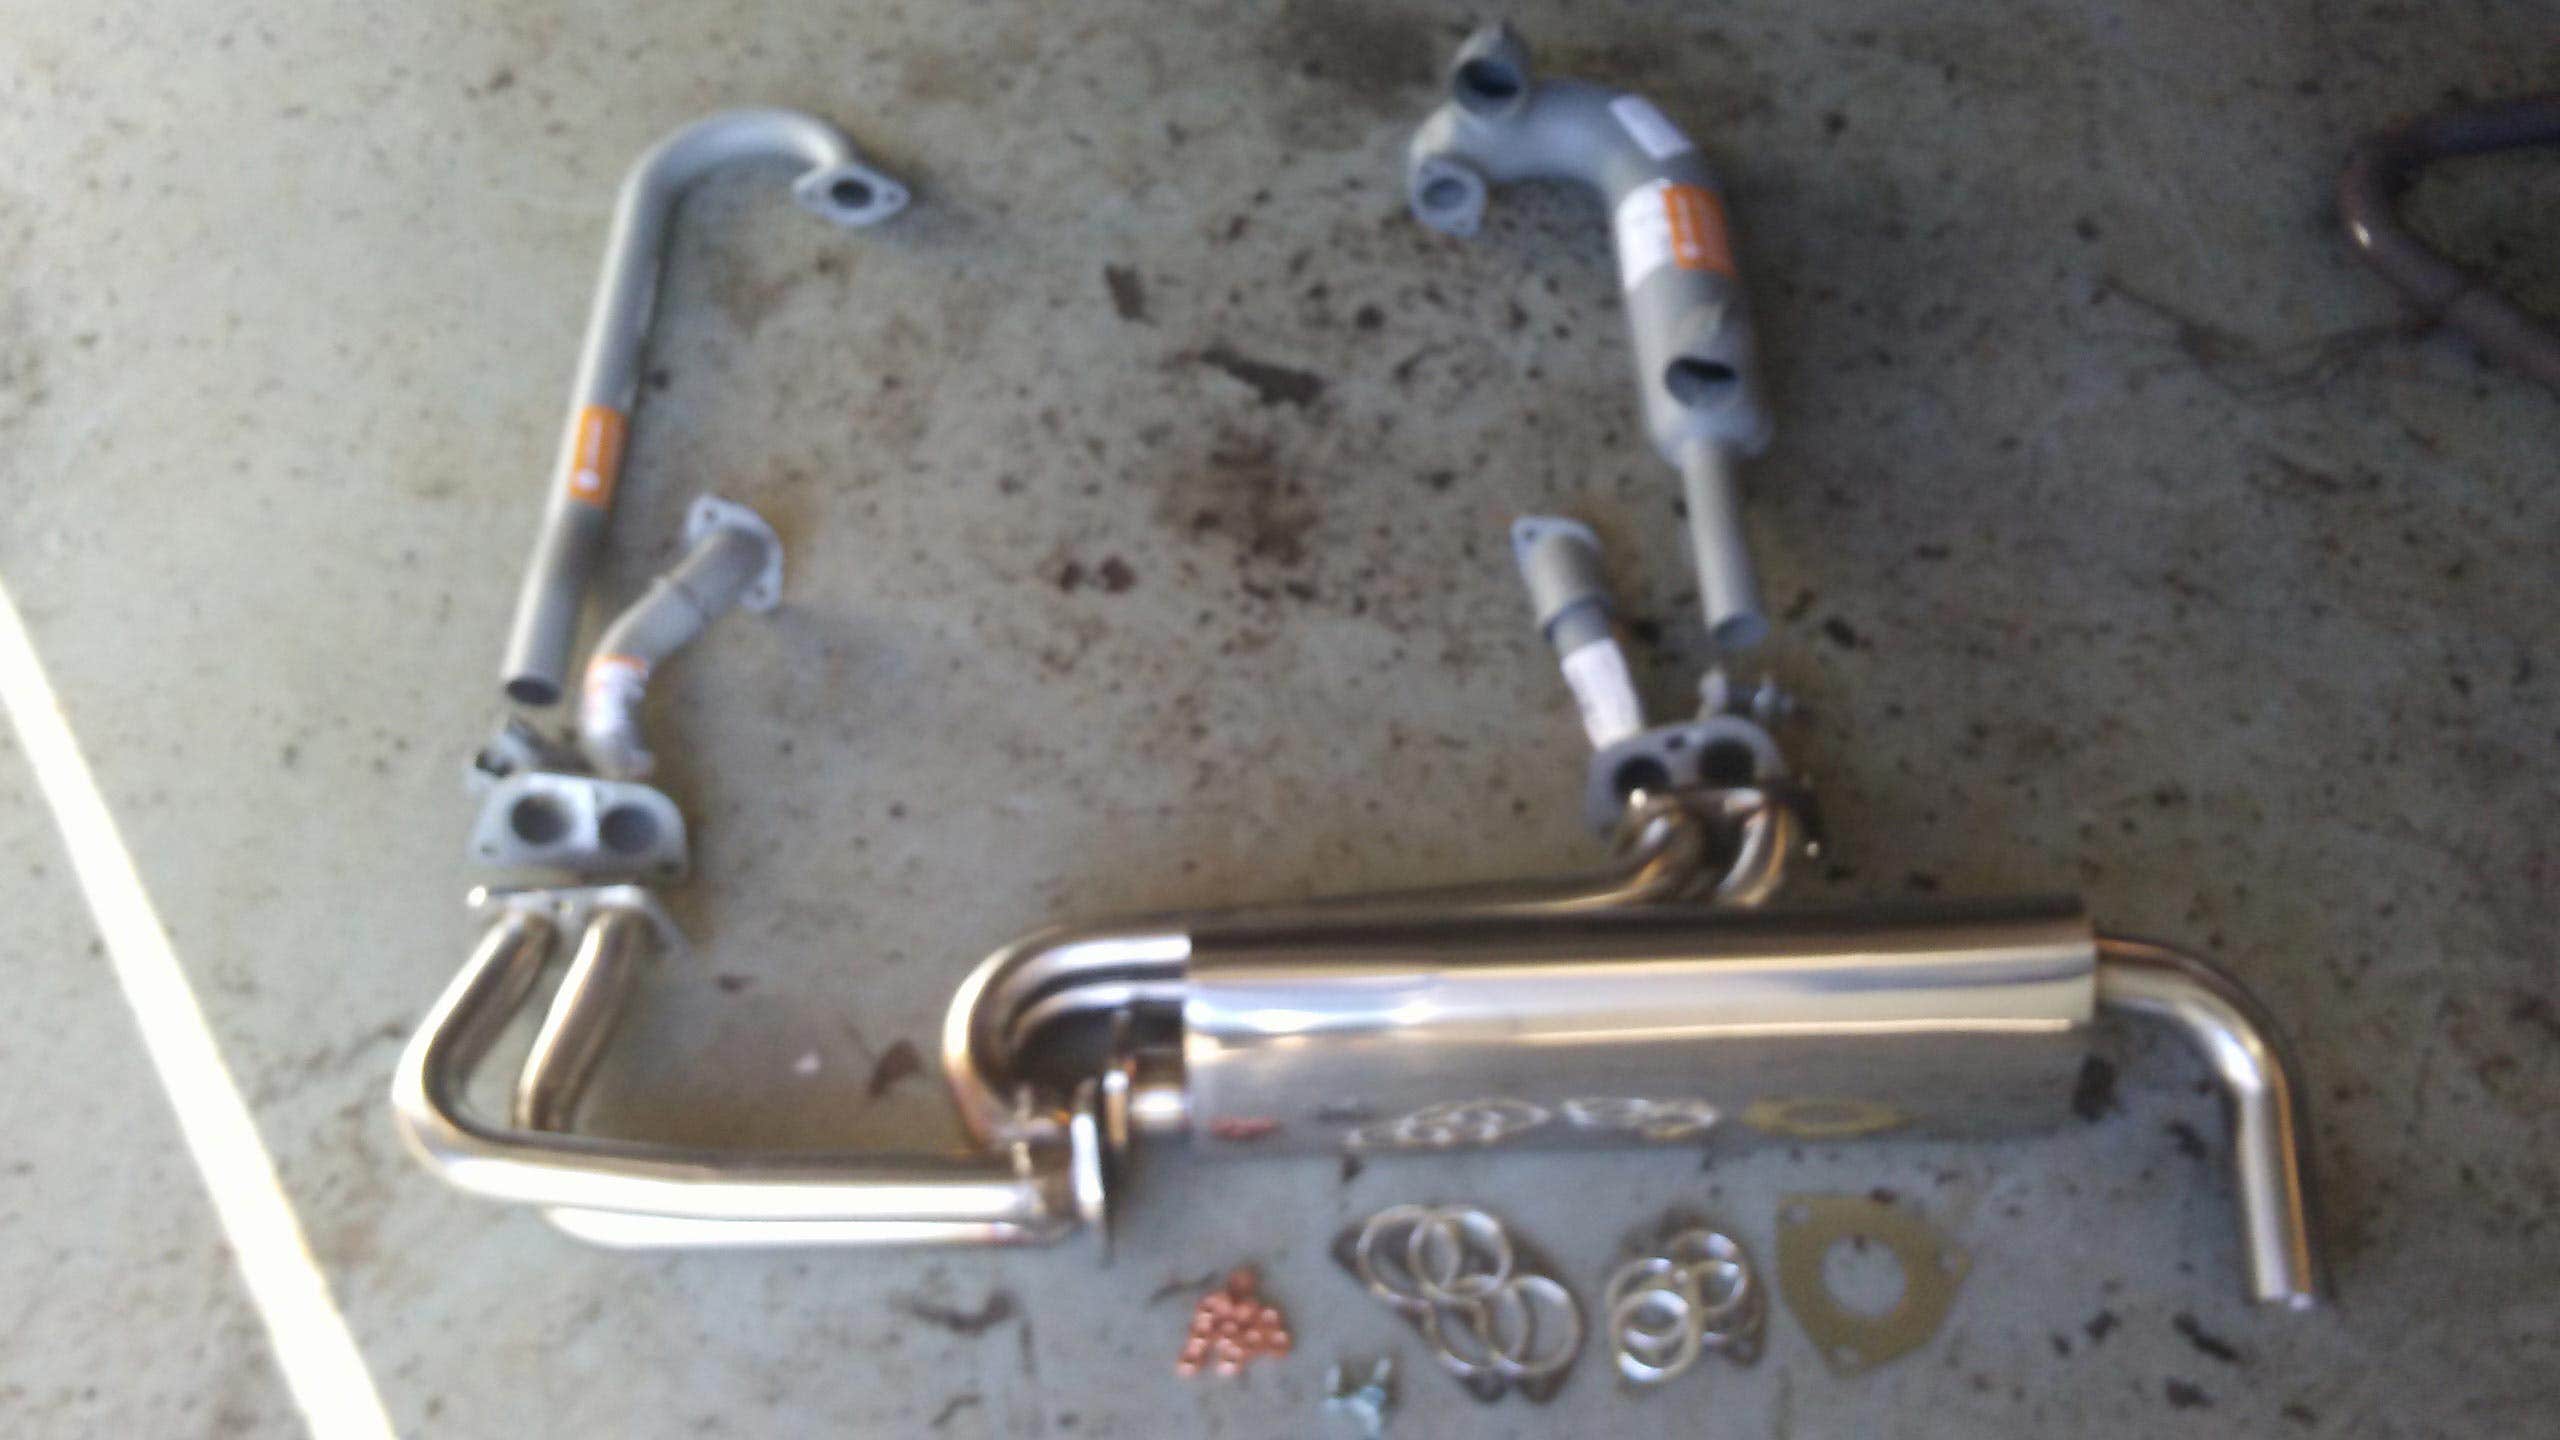
This requires the early style set up to fit, the complete system was fitted with new gaskets using assembly paste J11329. Once fitted I started the van it sounded great a nice mellow tone but with a bit of a rumble and yes, the tappets were still noisy! Happy with that, I turned to the water hoses.

When I had earlier removed the air filter box to clean it and replace the element, I had discovered the water hose hidden underneath had been wrapped in what looked like electrical insulation tape.
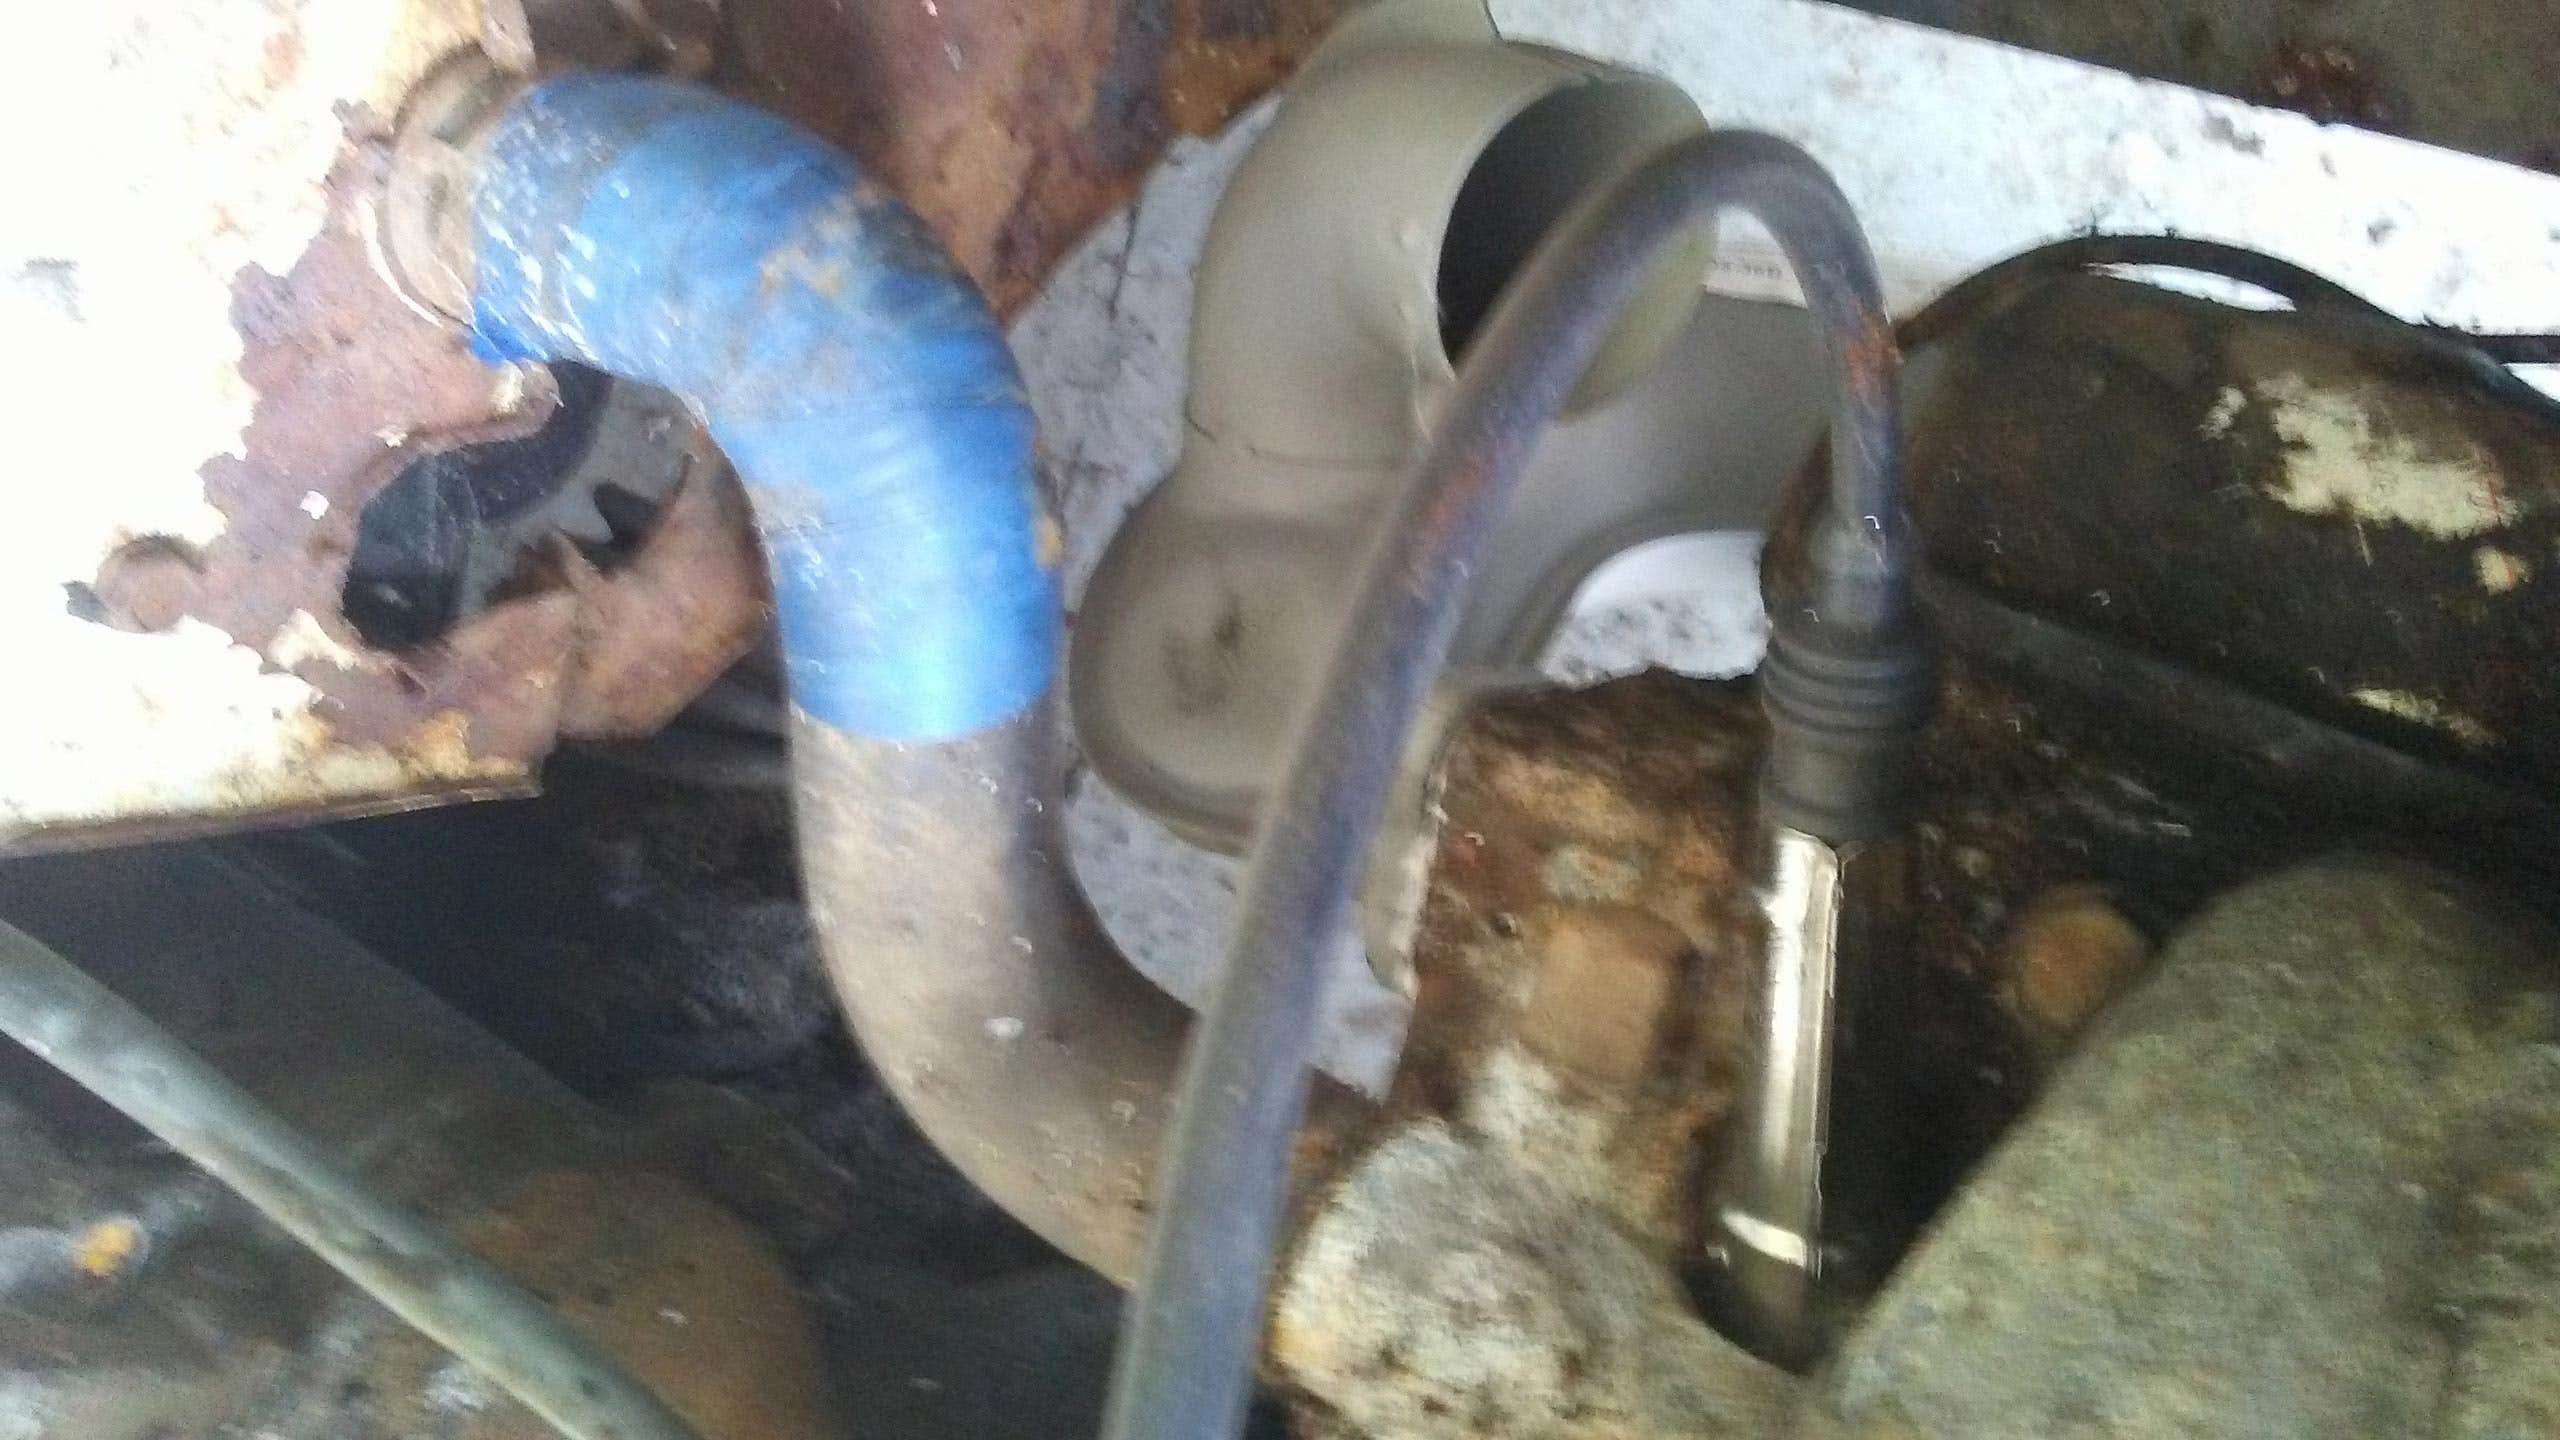
Clearly there had been issues with split pipes and overheating in the past. I replaced this and then started working through all the hoses inspecting them for damage and squeezing them to see if they made a crunching sound if they did this is a pretty good indication that the pipe has started to deteriorate internally so these were replaced.
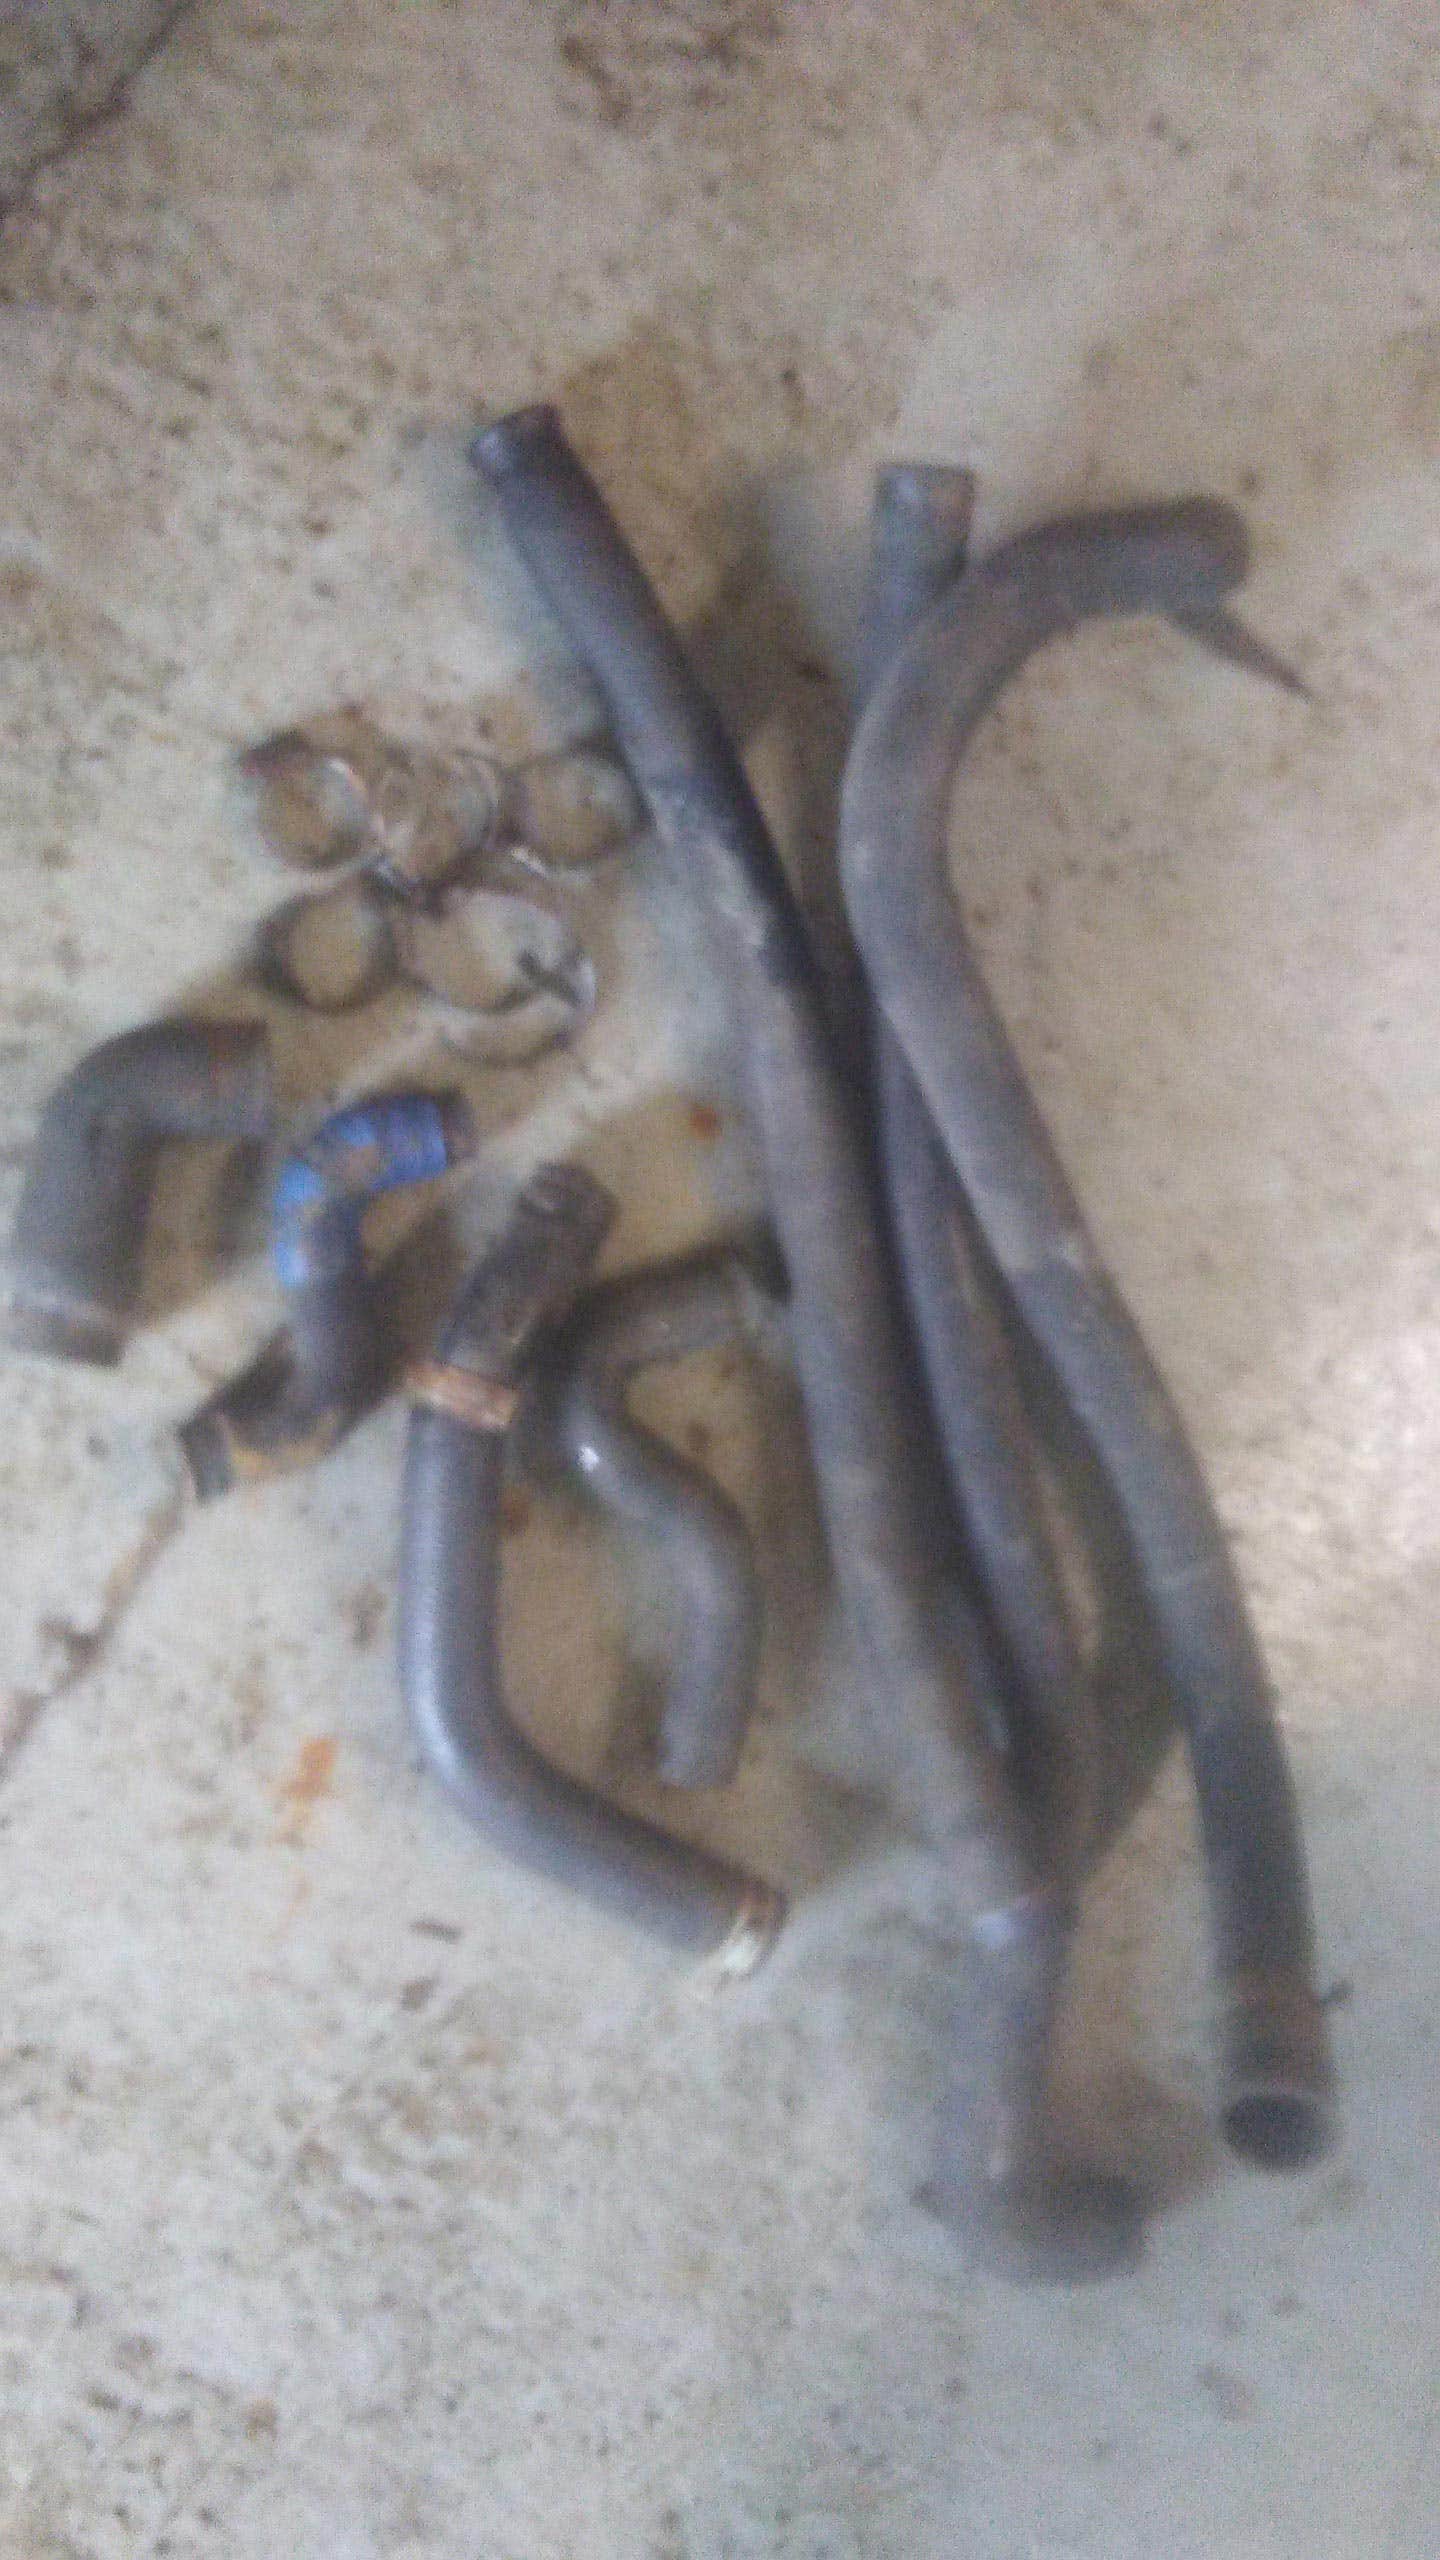
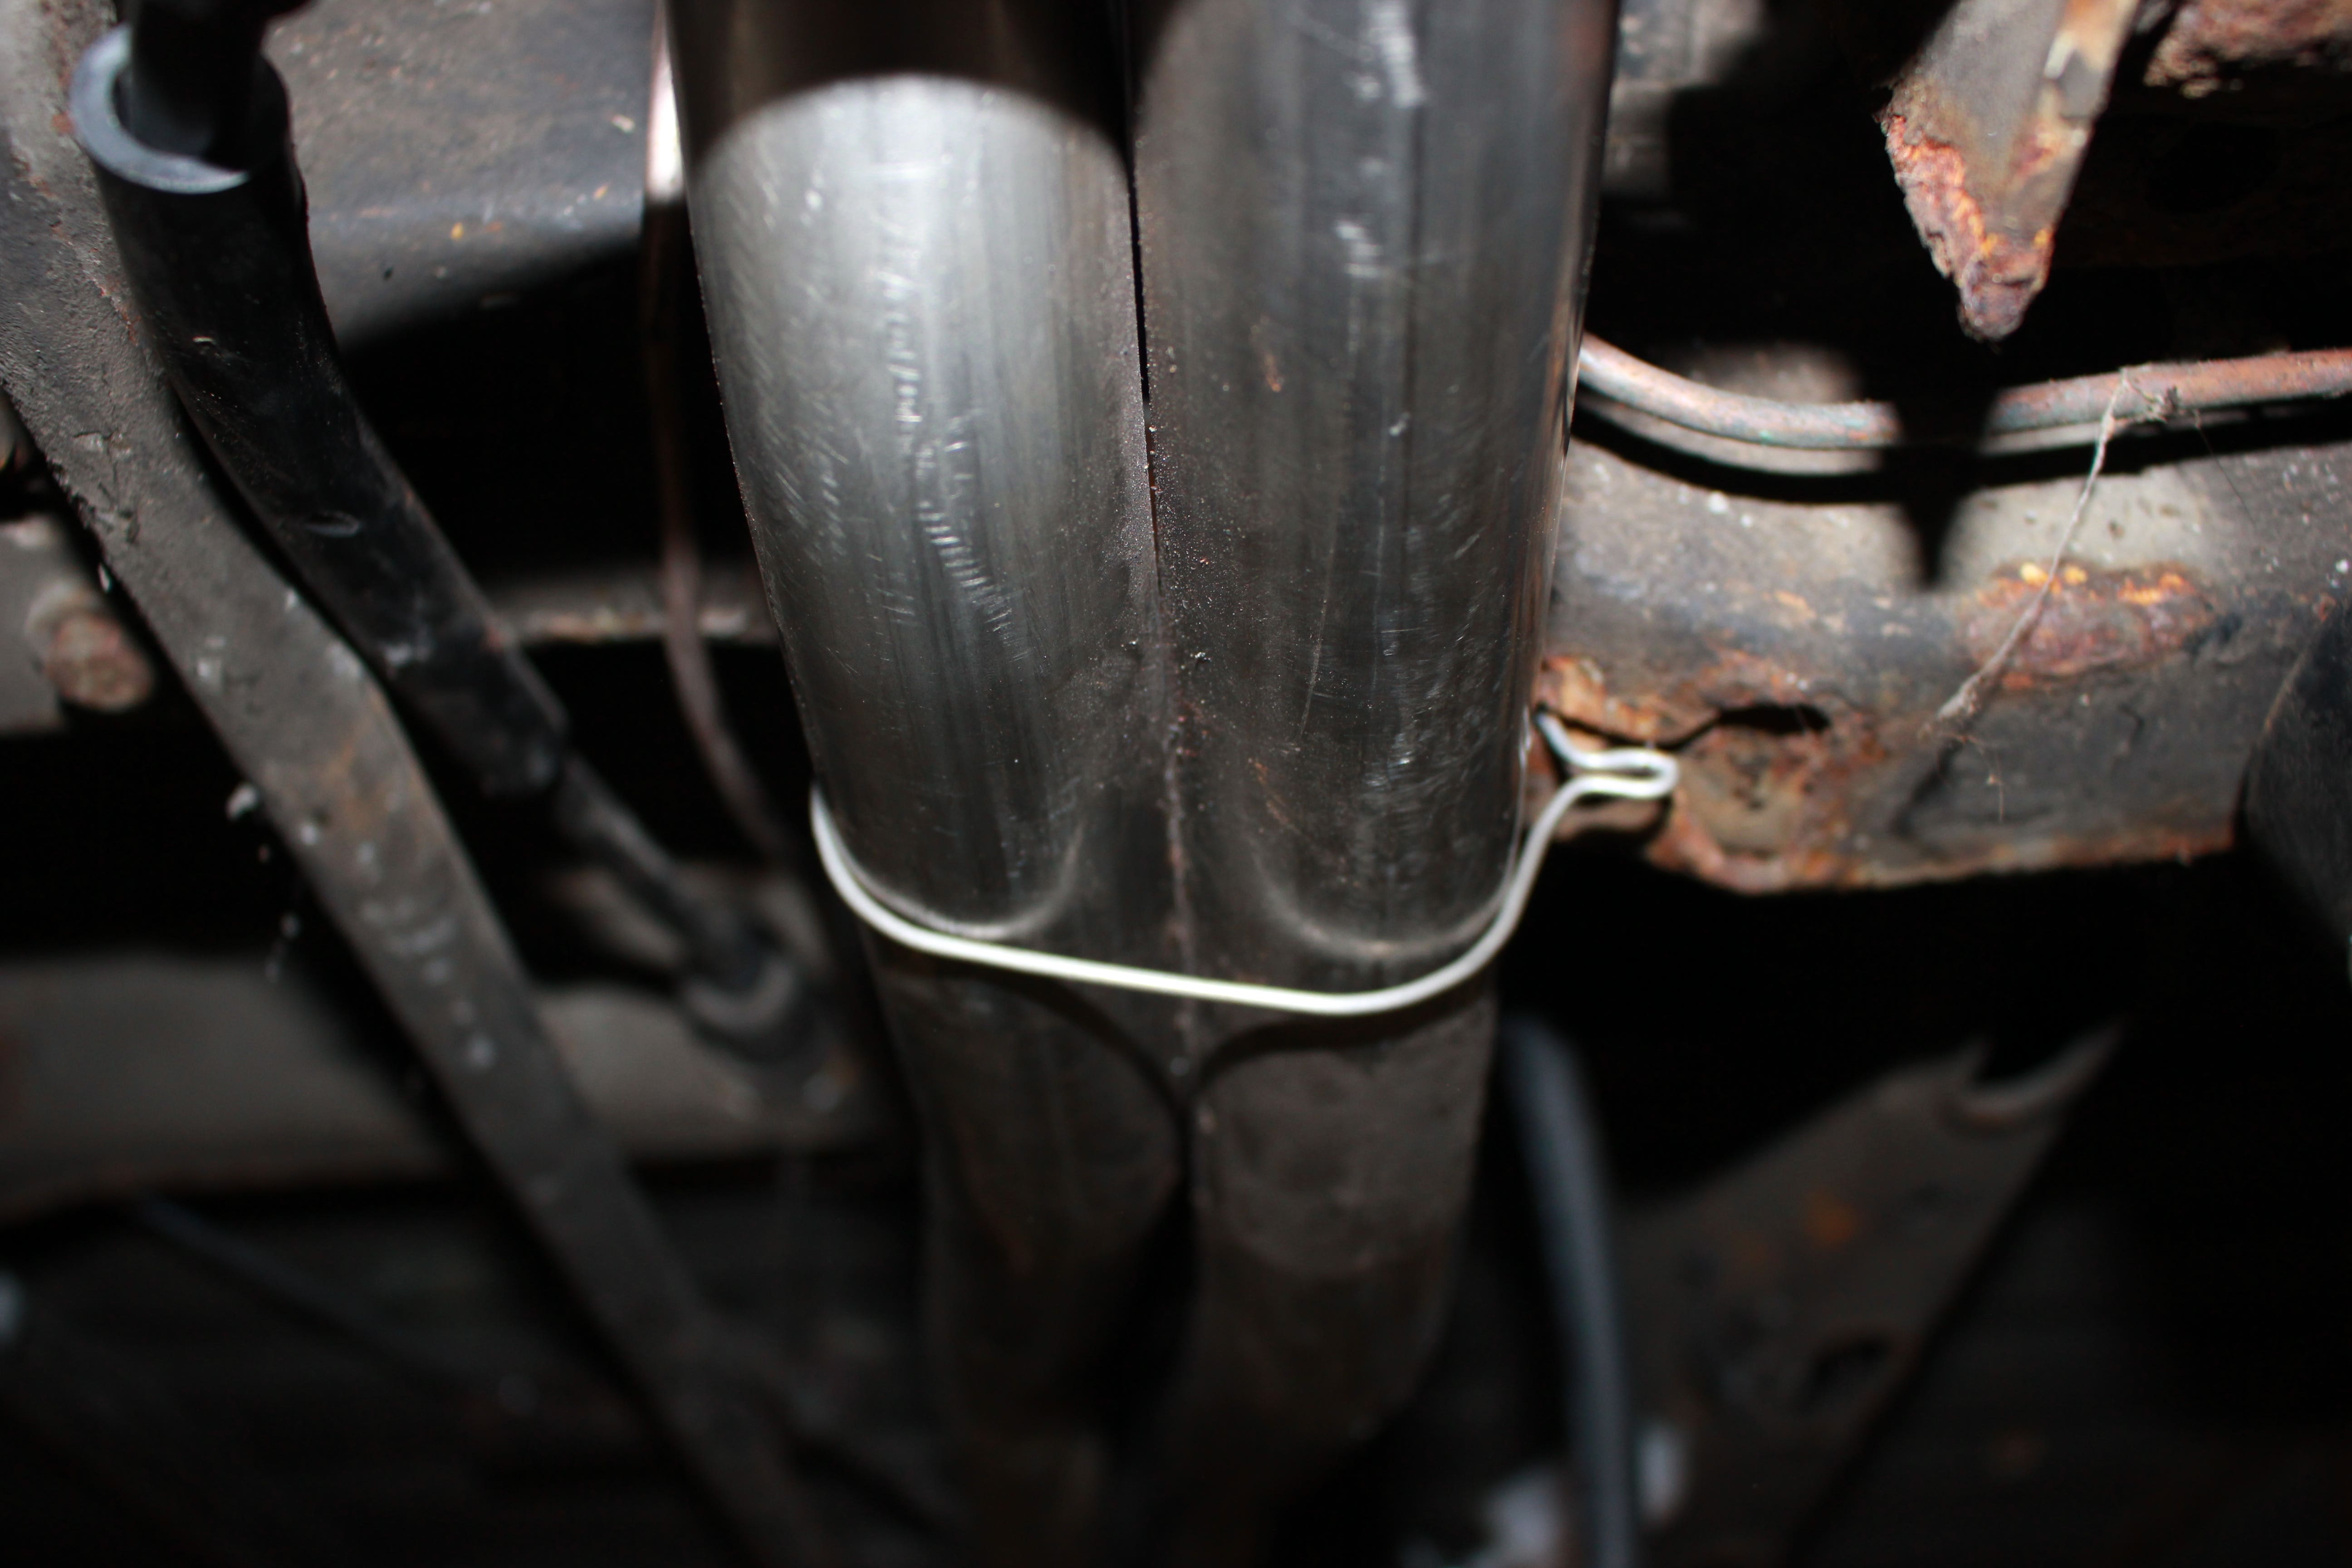
Moving to the front, I dropped down the spare wheel and carrier to check the radiator hoses, I then ran into a major problem. When I first viewed the van, I was happy to see it had the plastic front to rear coolant pipes meaning the original steel pipes that are prone to rust had been replaced. When I undid the first hose, unfortunately, I found the steel insert that holds the rubber hose in place had rusted away.
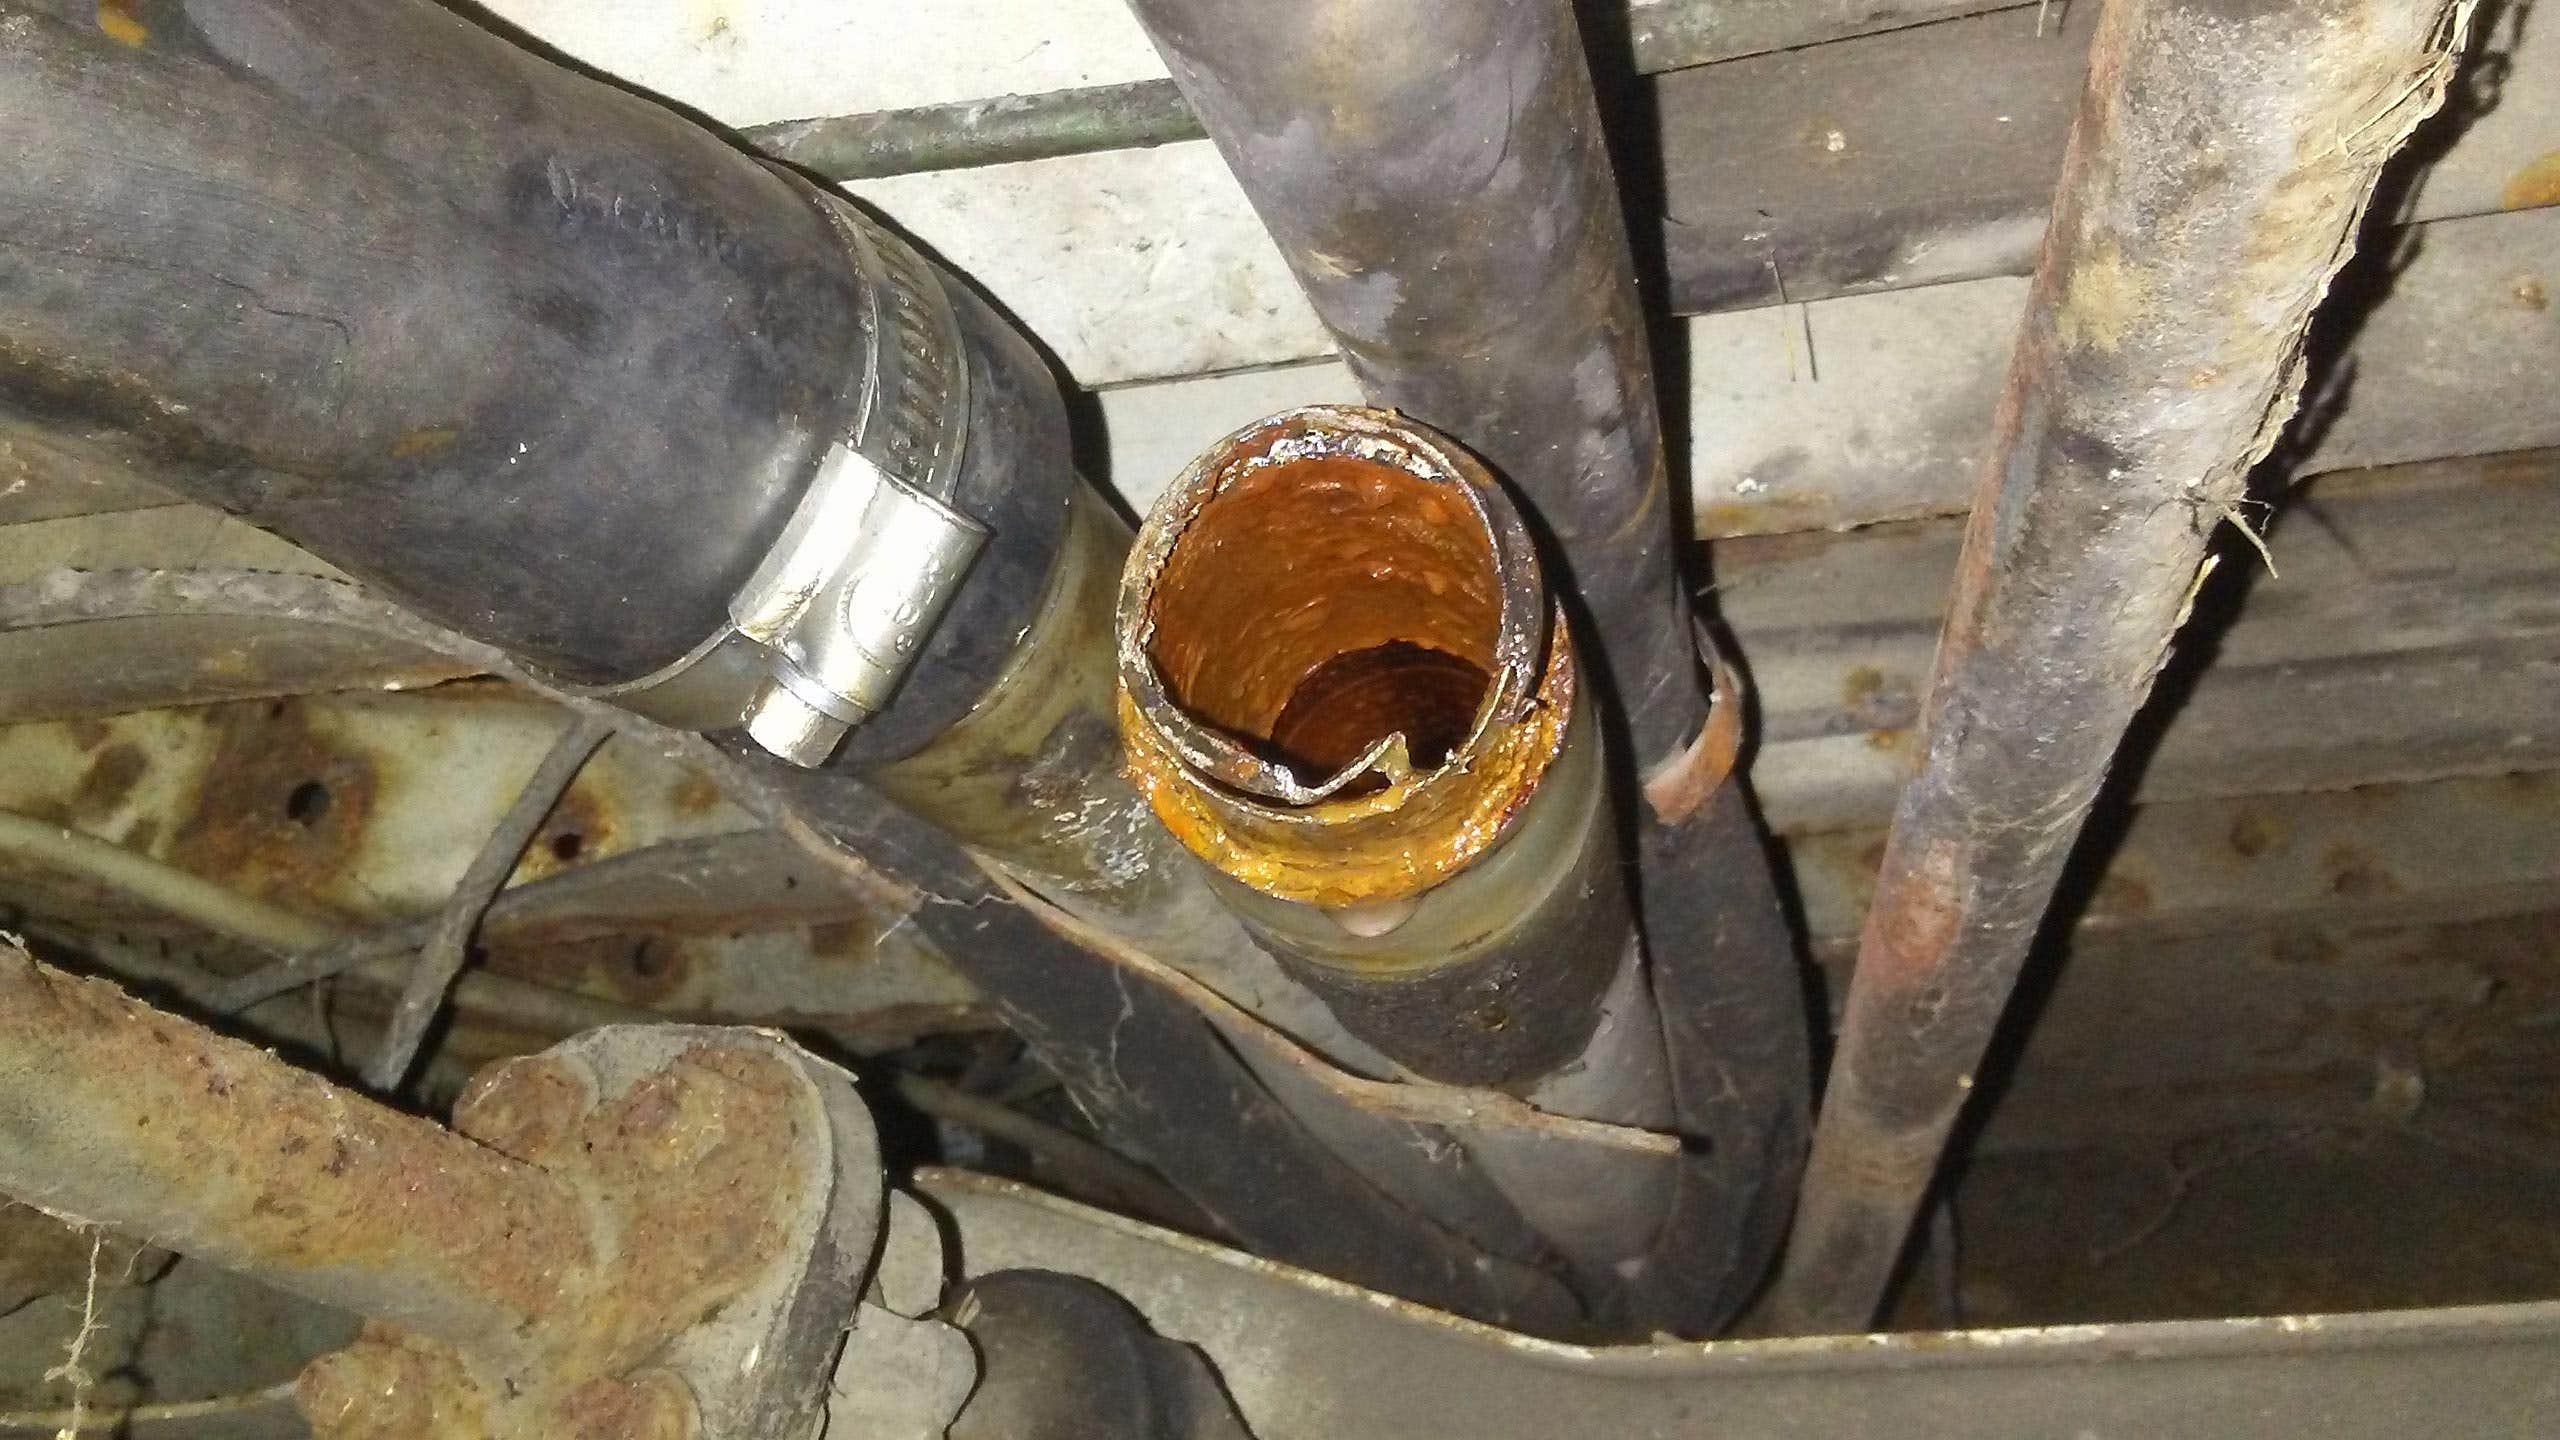
Although I knew this would need replacing, I still tried to fit the new part, every time I tightened the jubilee clip the hose just slid off the pipe, nothing else for it I would need to replace the front to rear coolant pipes.
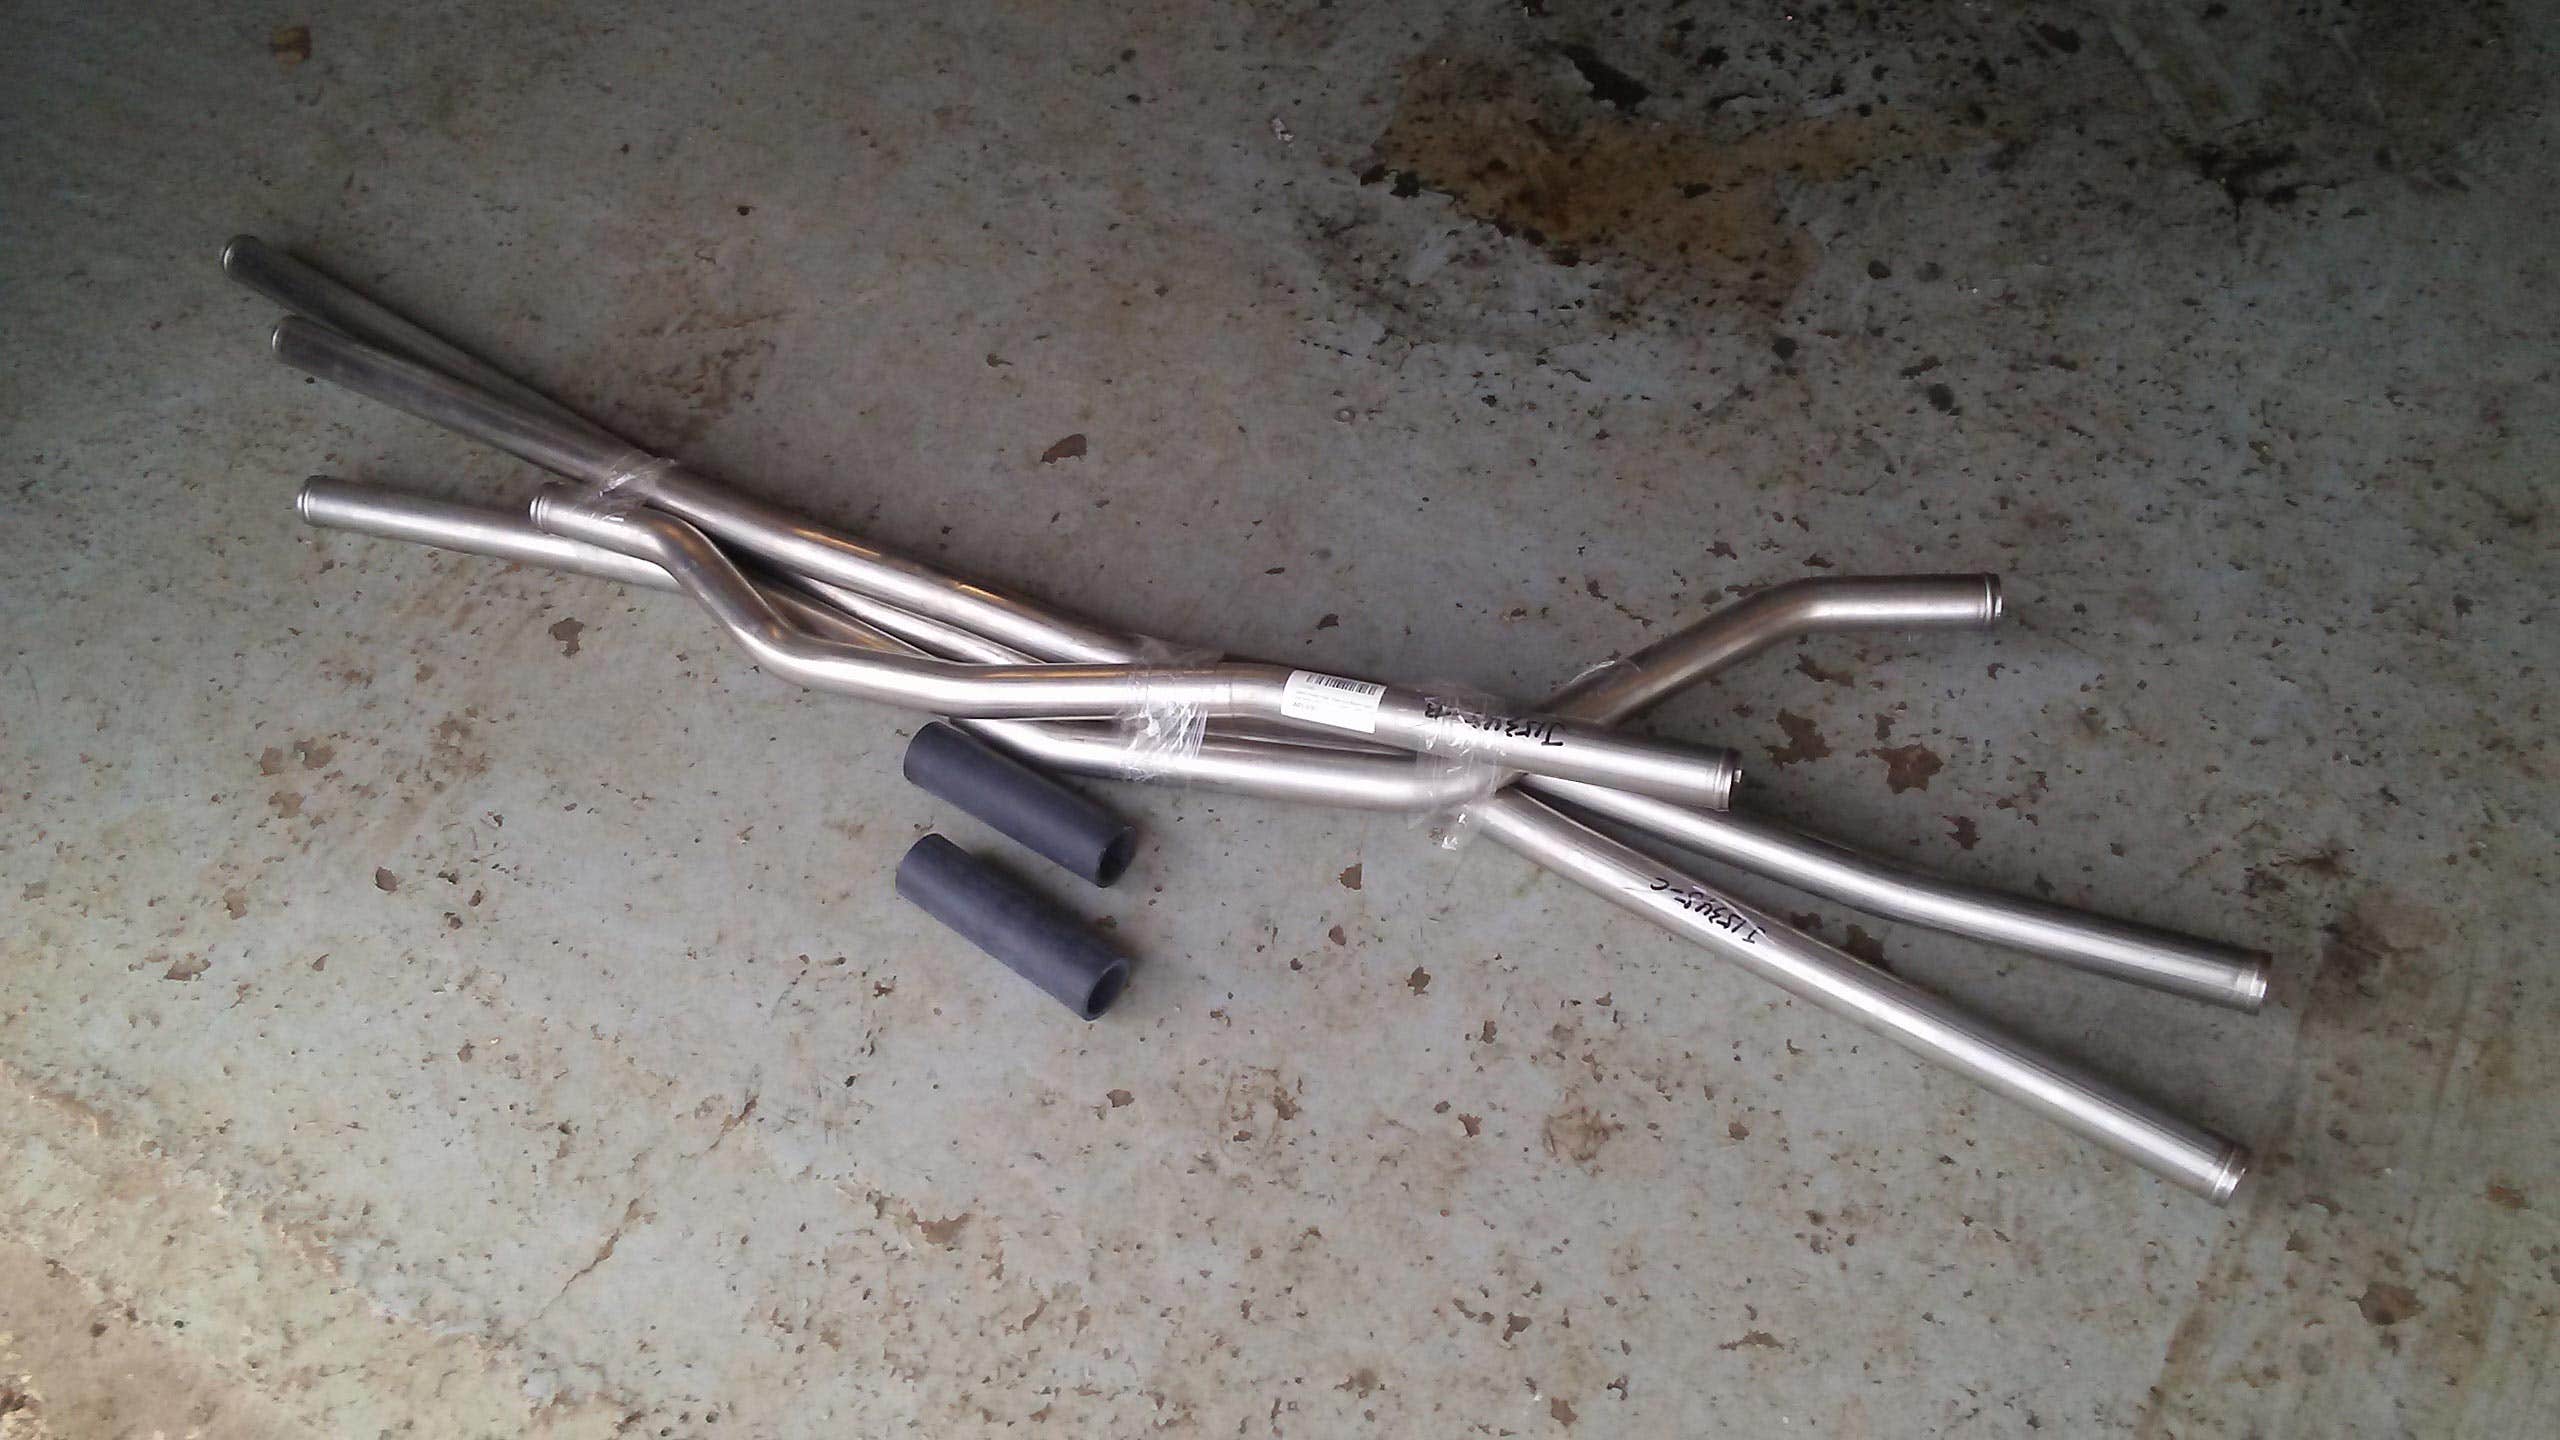
As mentioned earlier the original style metal coolant pipes rust out and as I discovered on mine even the replacement plastic pipes succumb to rust. Luckily JK has a solution, Stainless Steel replacements for my van/engine combination I needed J15345. These are made in 2 sections with a joiner rather than one long piece as per original this design is to help ease of fitting as you don’t need to drop the fuel tank to fit.
Before removal I’d advise marking which one is the feed and return and take some photographs of the layout, if fitted the wrong way around this can cause issues.
The quickest way to remove the old pipes is to cut them in ½ just before the fuel tank then pull the back piece to the rear of the van and the remaining piece to the front. With these removed, I laid them on the ground and matched up the 4 new pieces.
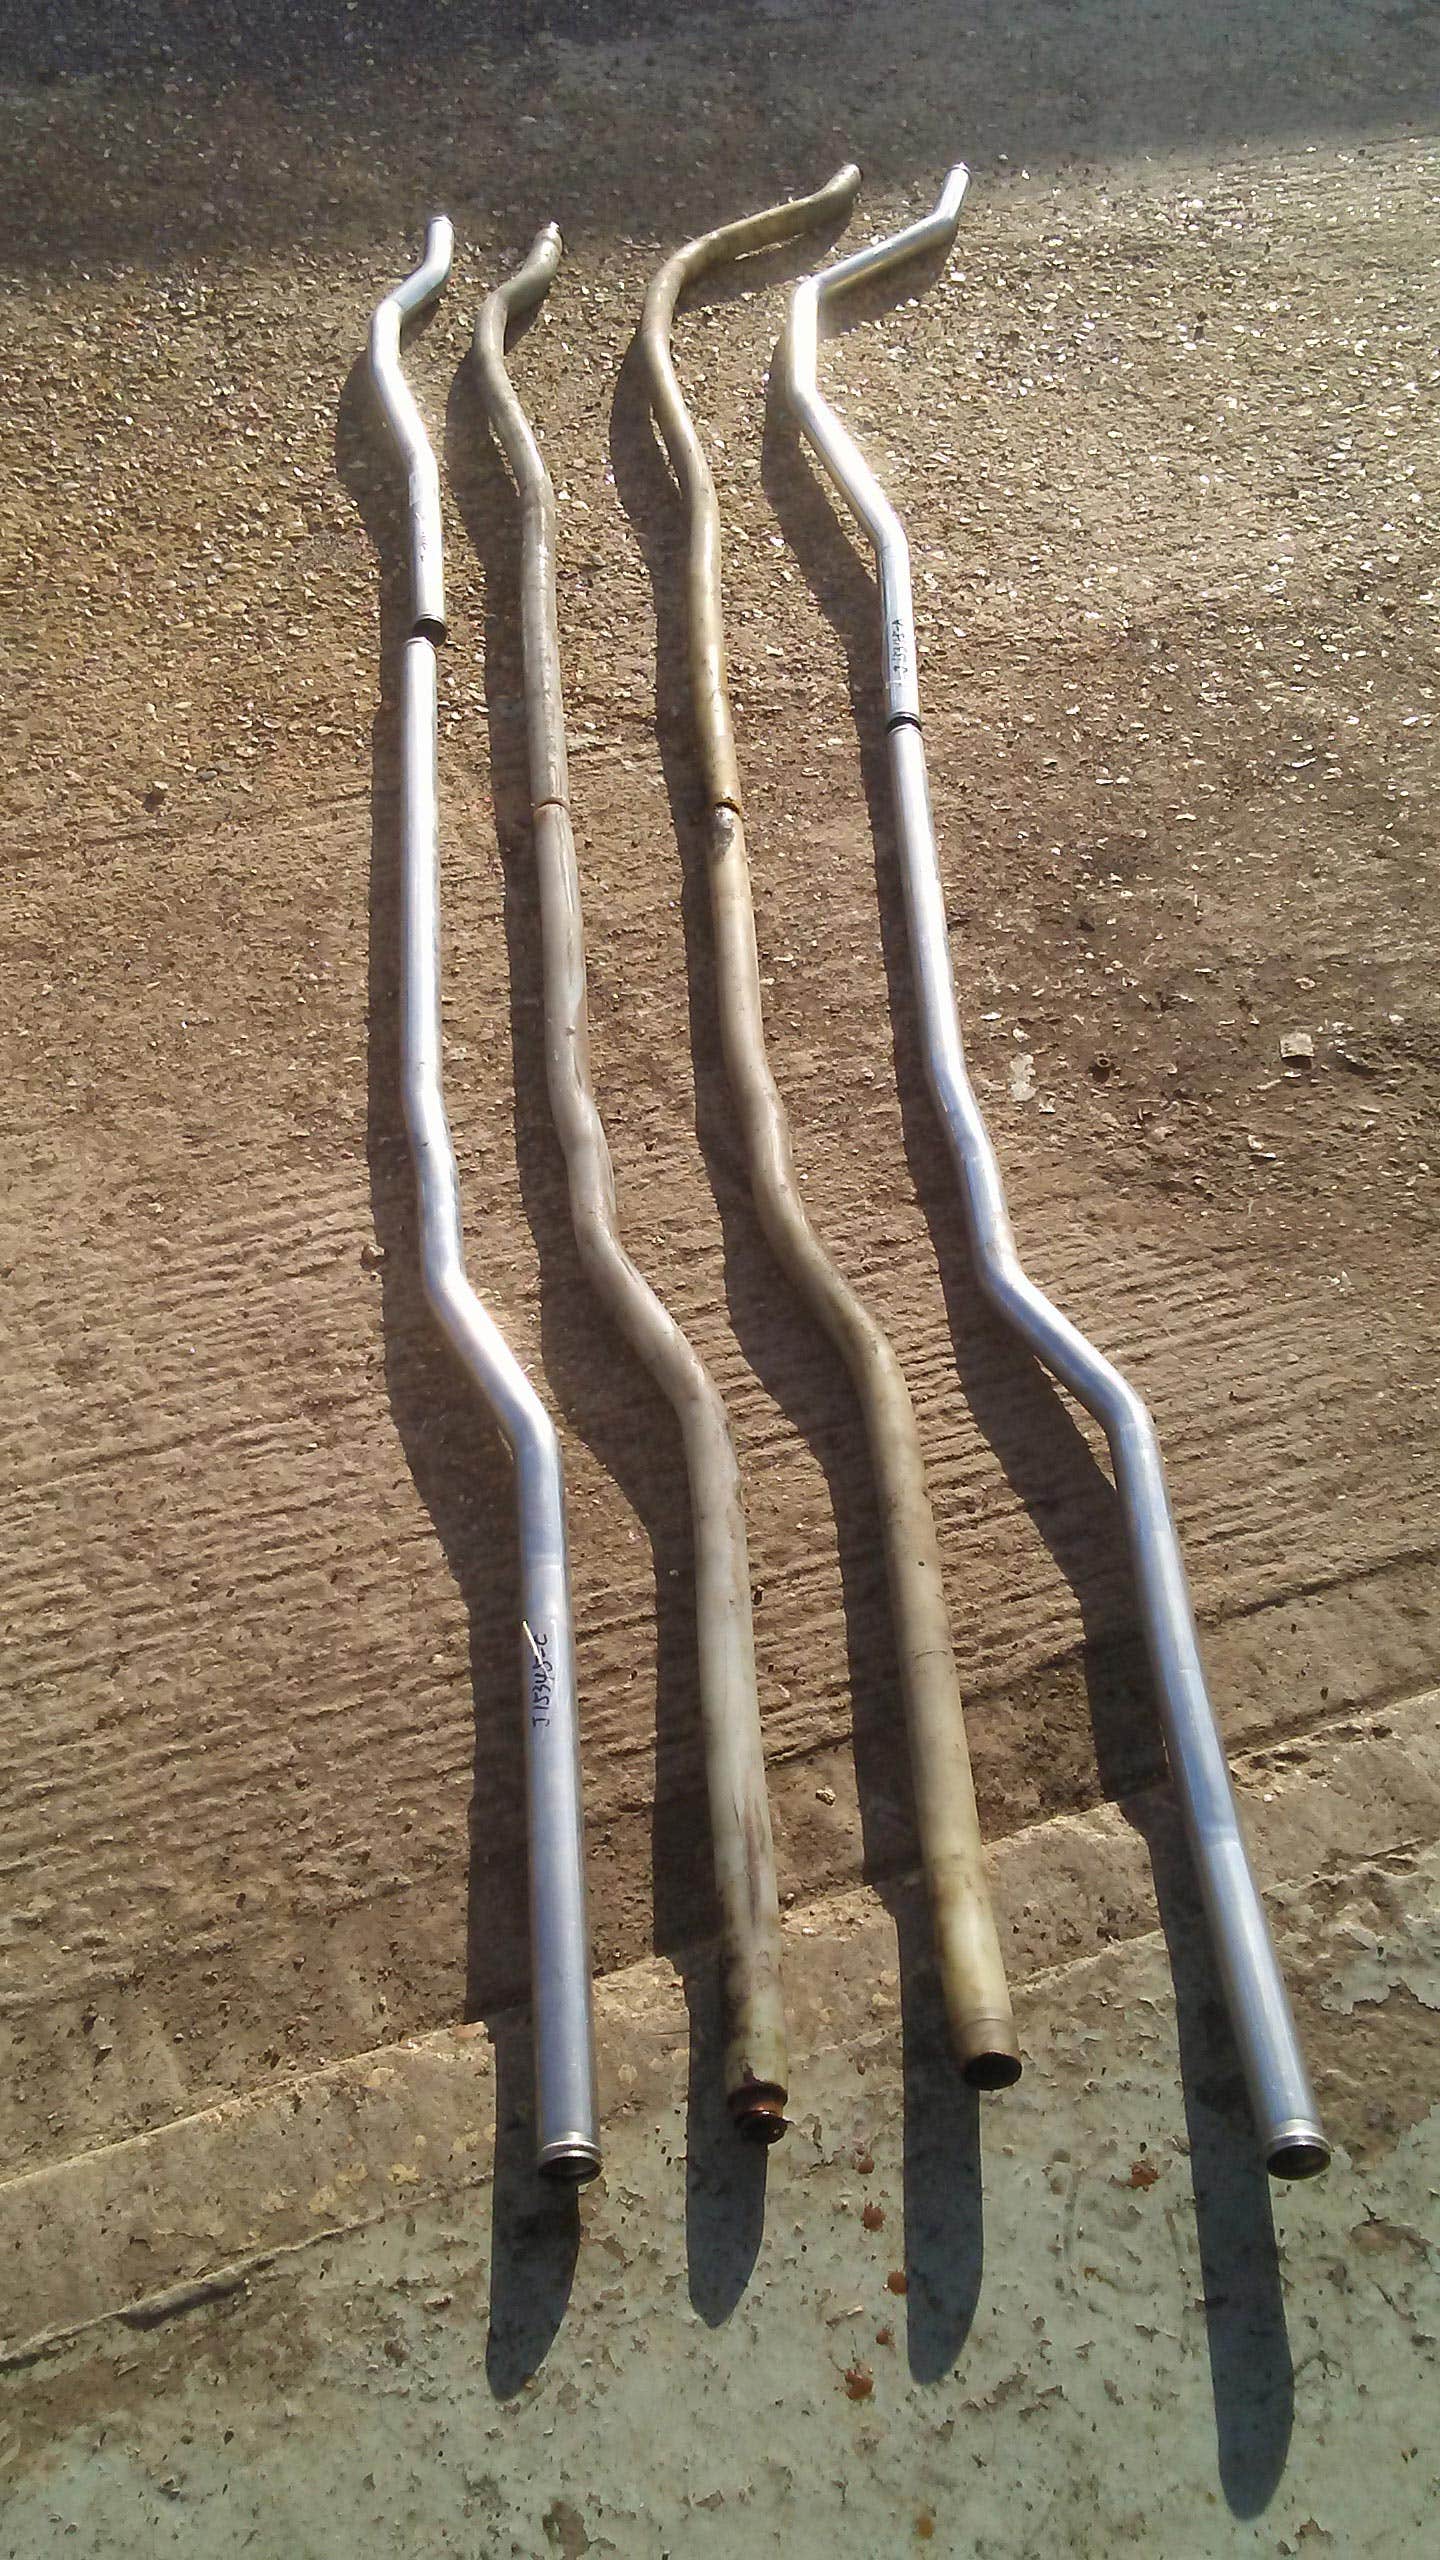
Back under the van I then slid the first pipe in place through the cross member and above the tank. I started to feed the second pipe in place but found it jammed against the other pipe and cross member. I spent a while pushing and pulling but the pipe was just too big to go in. Frustrating it was then I remembered VW advised if you fitted replacement plastic pipes the hole in the cross member needs to be enlarged. Looking at my van whoever had done the conversion hadn’t done this a quick look in the Official Factory Repair Manual J11329 This confirmed the size the hole needed to be enlarged to, once done the pipe slid in with relative ease. I then hooked up the rear pipes with the supplied joiners and finally fitted both front radiator hoses J29537 and J11604.
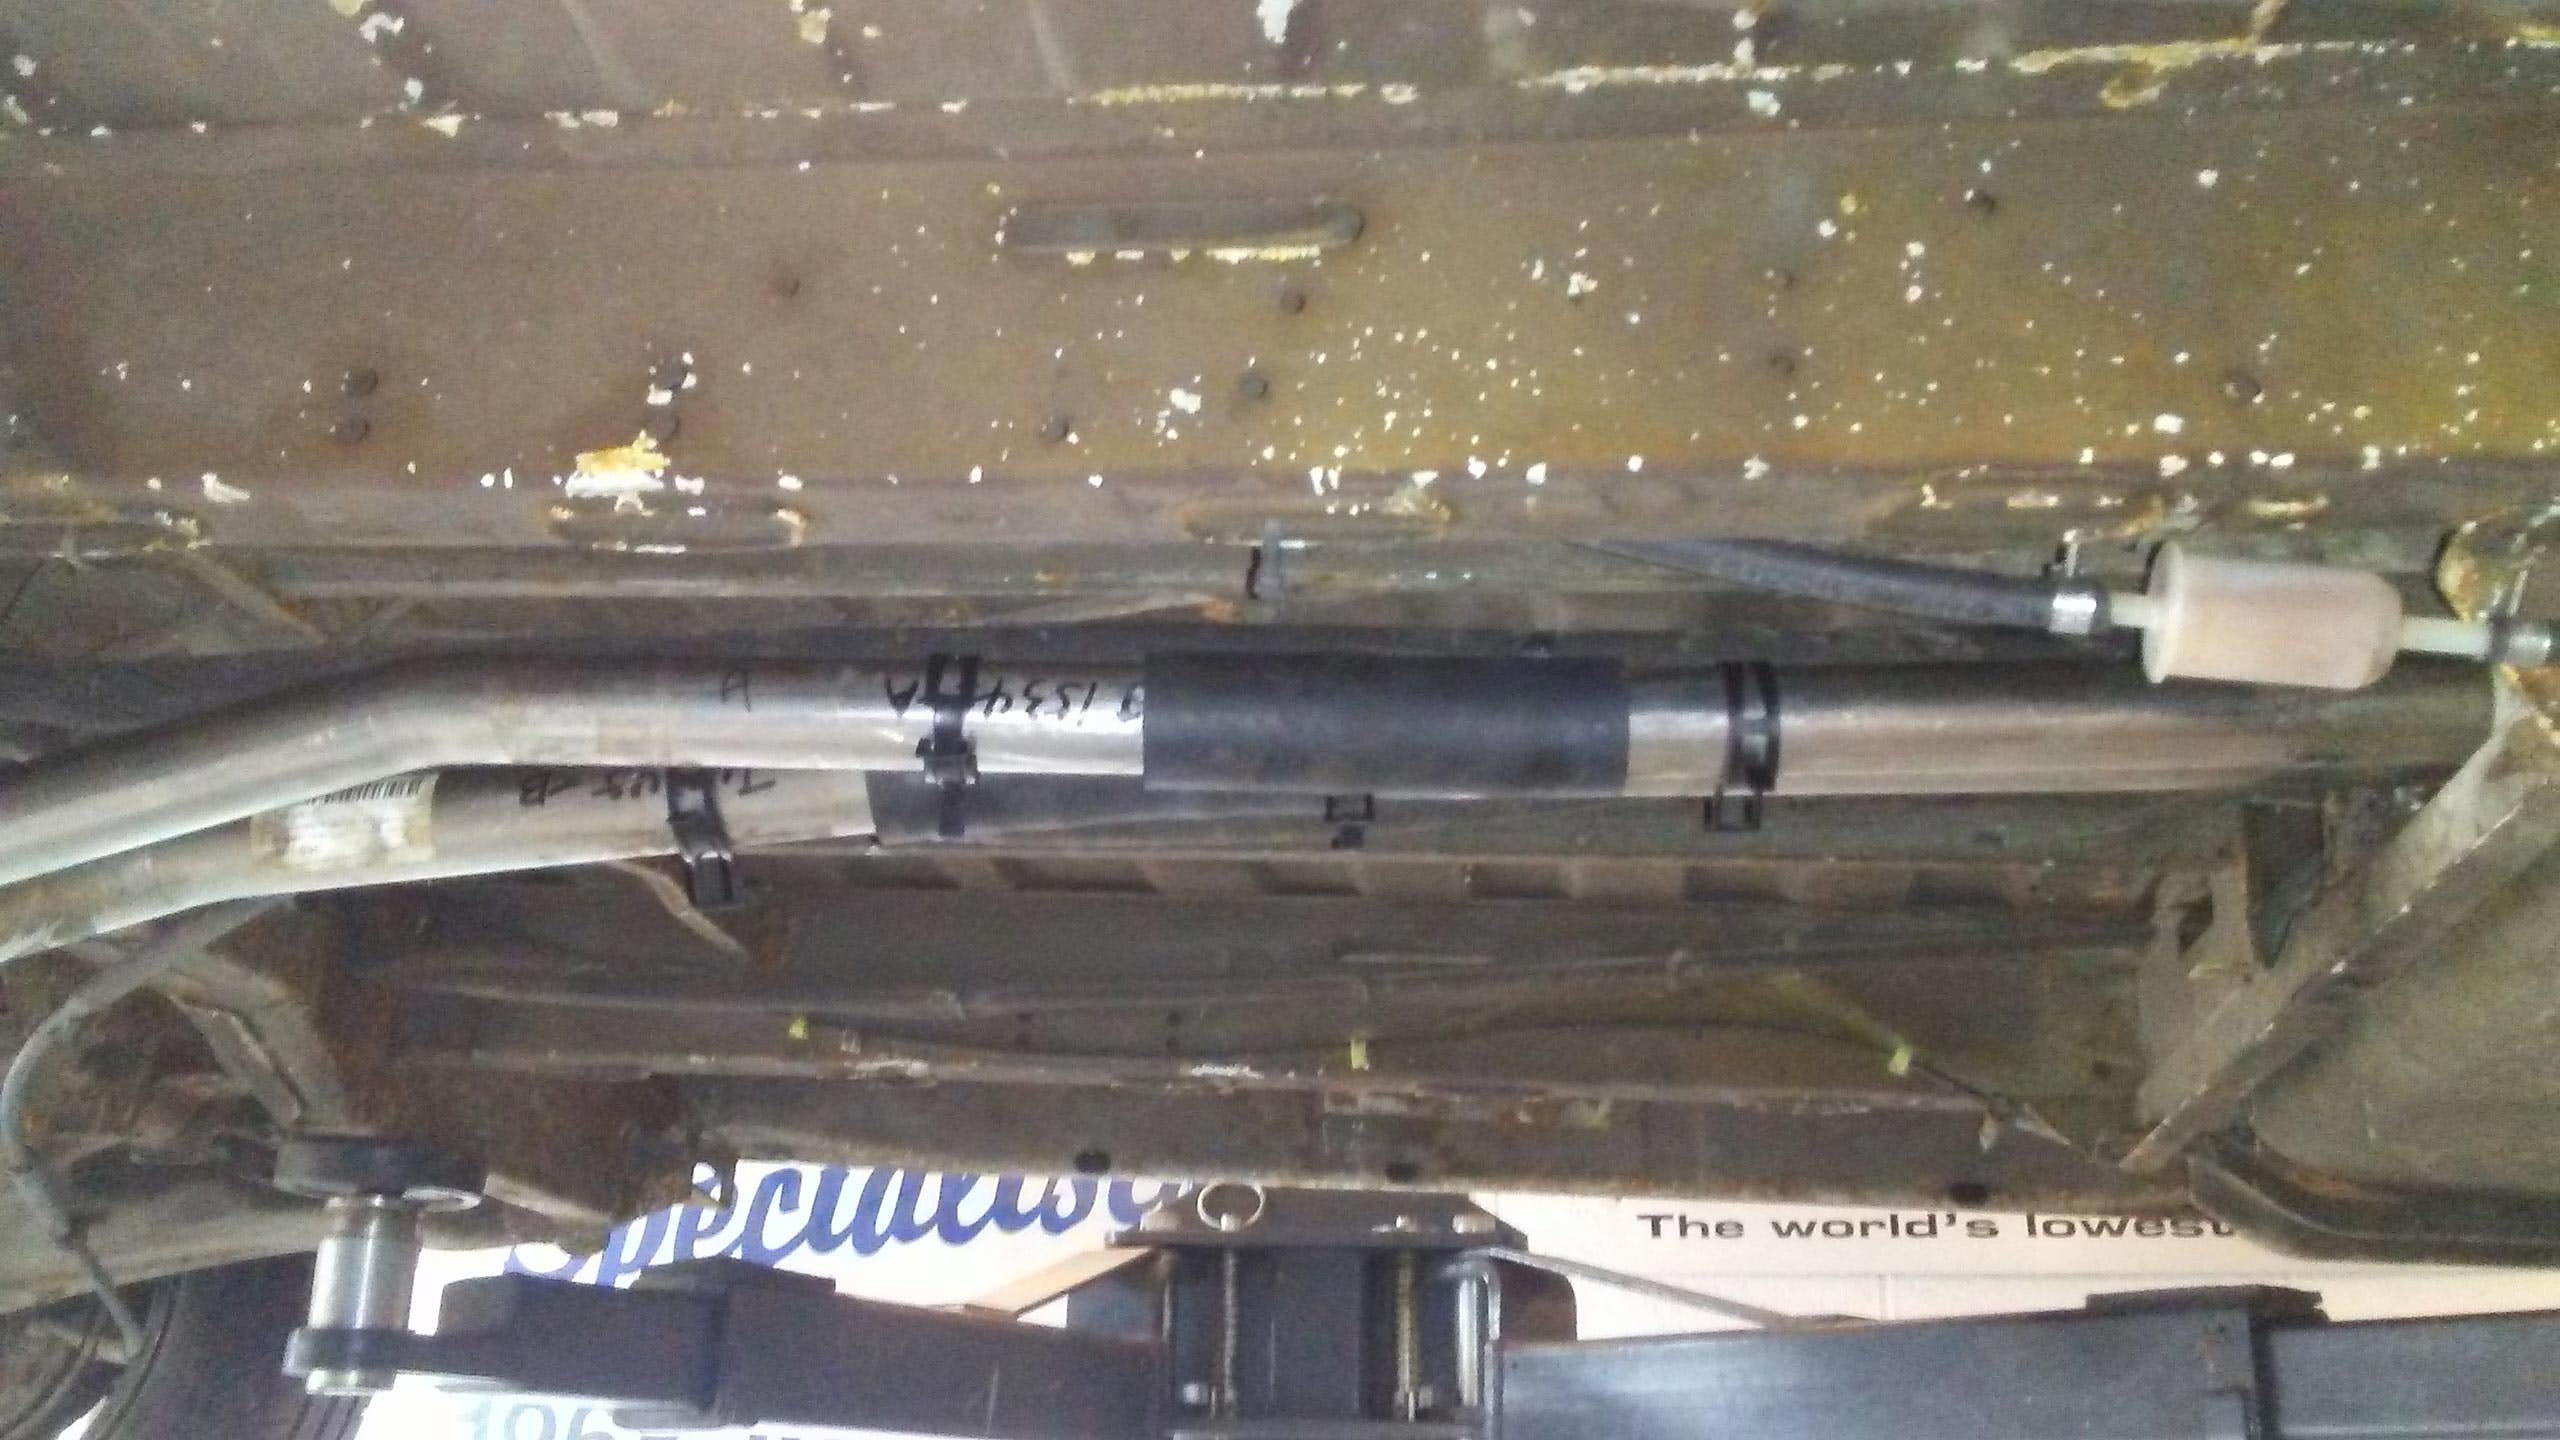
The coolant pipes are held in place by metal straps front and rear, when the previous pipes had been replaced the original straps are too small for the replacements, so these had just been left to hang.

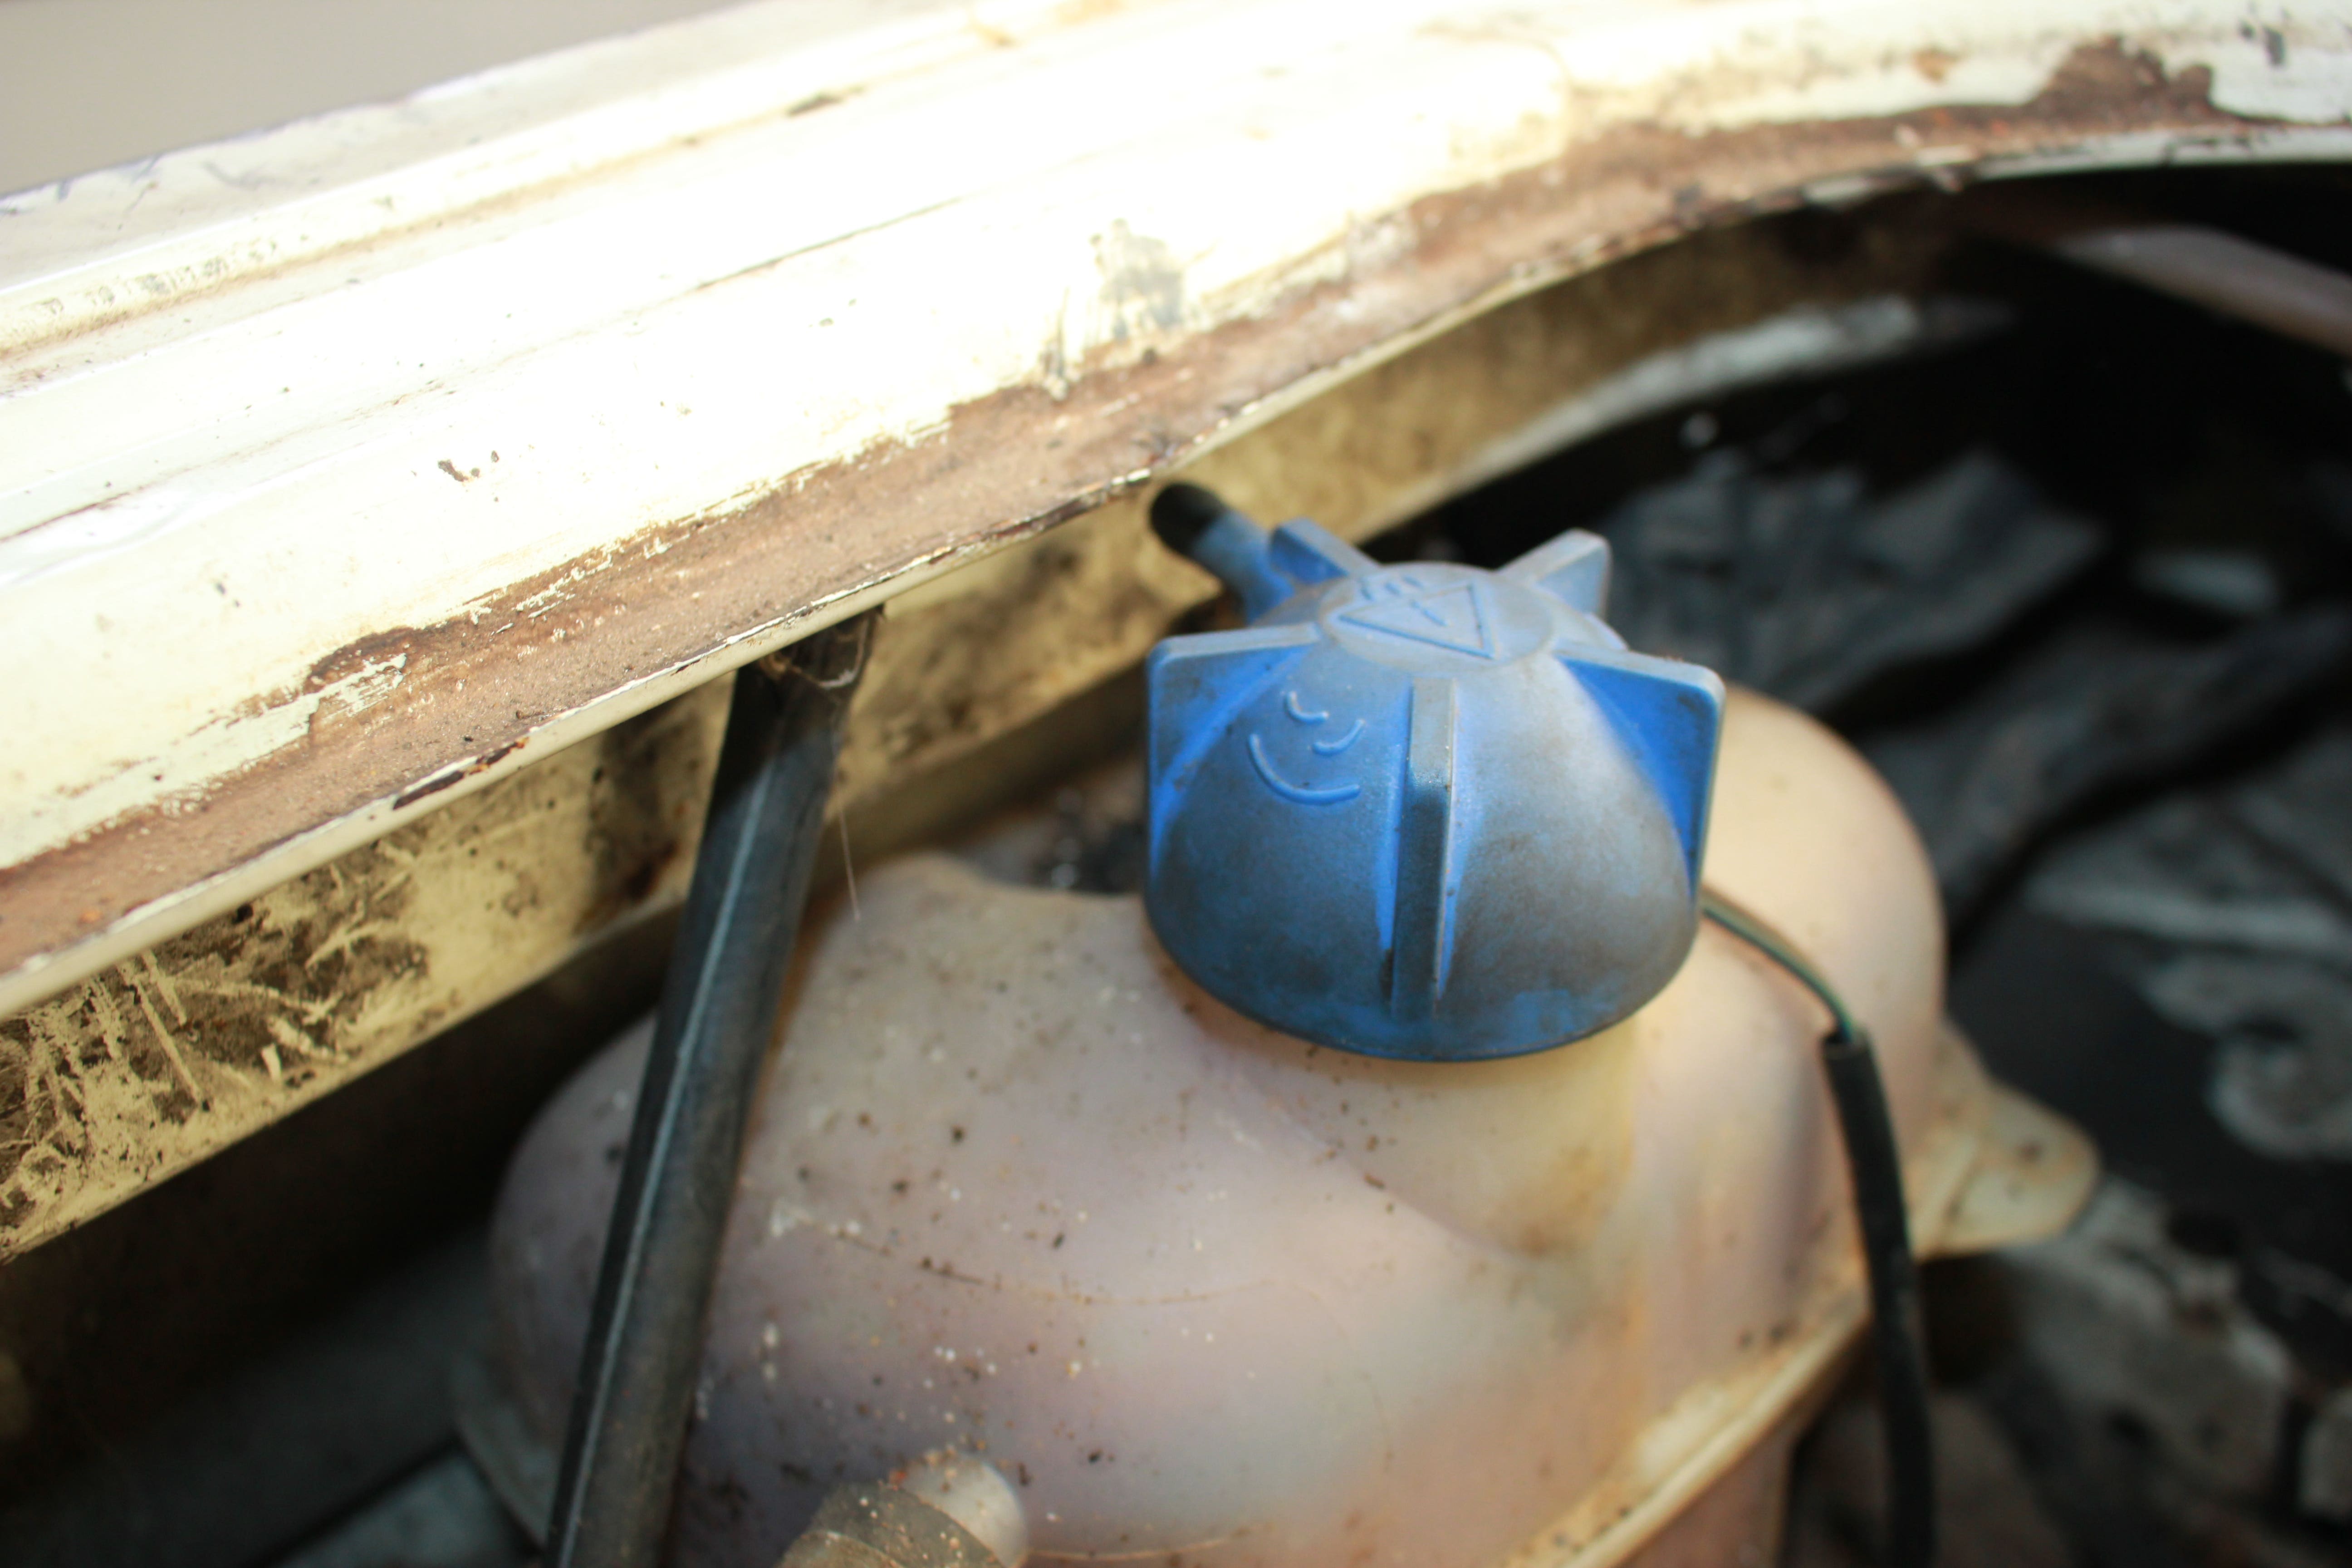
With the necessary pipes replaced it was time to bleed the cooling system. This is a subject that can cause hours of discussion if you do a quick Google you will find loads of theories of how and why you should carry this out in a certain way. VW say jack the front of the van up something I’ve never understood so never bother, the way I do this simple job as follows. Remove the front upper grill and undo the bleed screw on the top of the radiator. Then gently fill the header tank with anti-freeze water mix until no more will go in. (Anti-freeze is another hot potato with regards to the correct type to use, I use blue J10916 just because that’s what VW originally recommended) With this done I close the bleed valve turn the heater to full switch on the blower fan and start the engine. I'll let it idle for a couple of minutes then build the revs up to 2000 / 2500 the coolant level will drop allowing you to add more in, once full put the cap back on go to the front and open the bleed screw hopefully you get some air out, retighten then go back and add more coolant whilst revving the engine. As you add coolant and have the cap off don’t drop the revs or the engine will puke anti-freeze back at you (and yes I did that then spent 10 minutes mopping the floor) Keep following this process until no air only water comes out of the bleed valve, the header tank is filled the temperature gauge reads just under ½ and you have hot air from the heater. I filled the expansion tank then tried to attach the jointing pipe.
The van had been fitted with a replacement cap, for some reason when fitted it pointed at the side of the engine bay stopping the jointing pipe from fitting. We stock Genuine VW caps J43302 and those made by the OE manufacturer Blau J10399 I decided to use one of these. Once fitted the outlet pointed the correct way allowing the pipe to fit.
Read More in Part 2 >