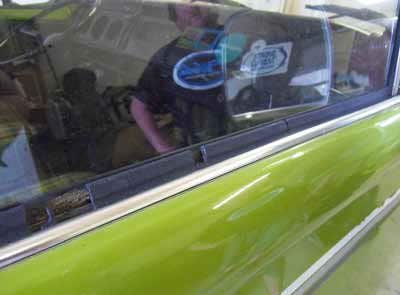
This is one of those fiddly jobs everyone tries to put off, but it’s essential to your Bus’s longevity and surprisingly easy when you know how.
Parts needed: Replacement window scrapers
Tools used: Screwdrivers and socket sets (a proper trim removal tool will make life easier, but you can use a flat head screwdriver if you’re careful), tin snips, spray glue, scissors and plastic sheeting to replace waterproof door membrane.
Skill level: 2
Time taken: Put aside at least half a day for this job, as some aspects of it can be very fiddly.
Cost: DIY - £90-£100, Pro - £250-£300 approx.
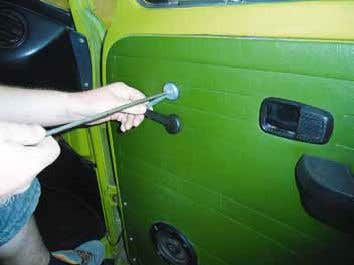
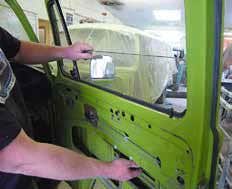
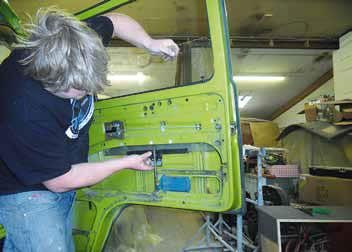
1) The first job is to remove all hardware from the inside of the door. If you have speakers and aren’t sure about the wiring, take a picture first so you can put it back in the same way or label everything with masking tape. If you have air vents in the bottom corner of the door cards, leave them on as they come off with the panel.

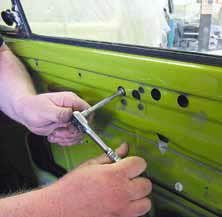
2) Original window winders have a plastic cover which you gently lever off with a flat head screwdriver to expose the centre screw. Remove the screw and the winder. The door opening lever surround is removed by prising off the centre cover under the pull lever to reveal the screw.

3) There are different door pulls depending on the age of your Bus. This one has a larger armrest style and you will find the screws on the underneath. Other vans have a simple door pull on which the screws are clearly visible.
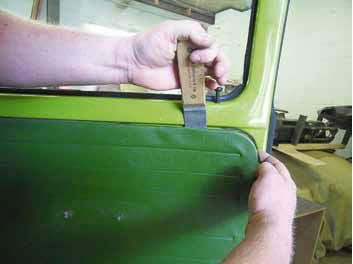
4) Once everything has been taken off, you can remove the door card. Insert a trim removal tool between the door and the door card and gently lever the door card free, working around the door to free the panel clips. If you’re using a flat head screwdriver be very careful not to lever against the paintwork and damage it. If you have the air vent in the bottom corner, wiggle the vent over the blue control lever to release it.

5) Remove the plastic membrane. Now use the window winder you removed earlier to lower the window until you can see where the glass bolts to the window mechanism with two M6 bolts. Remove the bolts and VERY CAREFULLY lift the glass assembly out of the winder mechanism, then lower it to gently rest on the bottom of the door.
6) Now pull out the felt channel. Under this you will find some retaining clips. Use a flat head screwdriver to slide the tabs out of the holes that hold them in. Remove all of the clips as they also hold the window scraper in place.


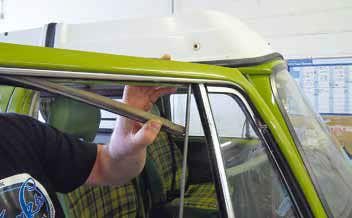
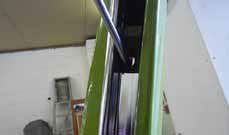
7) In the top of the door, remove the screw which holds the top of the quarter light window in place. To free the bottom of the quarter light, you will find a bolt which can be accessed through a small round hole under the edge of the window. Now it gets fiddly – you must wiggle the quarter light out of the opening, being careful not to break the window inside the door with the bottom of the quarter light frame or take a chunk of the paint off the edge of your door! Take your time and be patient here.
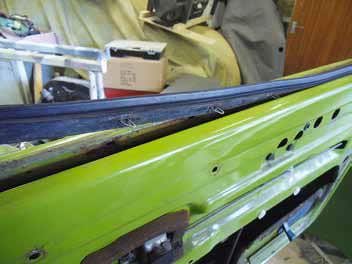
8) Now you can access the inner scraper. It makes life a lot easier to remove this at this point so you can see what you are doing later. Working from front to back, lever the clips holding the scraper to the door out with a flat head screwdriver. Use the same technique to remove the rest of the outer scraper.
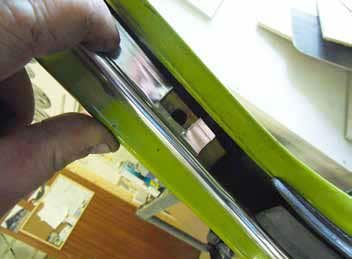
9) Offer up the new outer scraper. Make sure the scraper has slots that line up with the holes in the door for the retaining clips. Personally, I’ve never found a new scraper that has the holes in the right place – some don’t have any at all! Use tin snips to adjust or make holes as necessary. Once everything lines up, the bottom edge needs to be attached first by pushing the sprung clips into the small oblong holes in the door being very careful not to bend or damage the fragile aluminium trim. Replace the felt channel retaining clips which will hold the rest of the scraper in place. A good tip is to leave the clip next to the quarter light out as it’s easier to put the frame in without it


10) Replace the inner scraper, working from front to back and pushing the clips home firmly.

11) It’s time to replace the quarter light! This is by far the fiddliest bit, so go have a cuppa now to prepare. When you’re feeling calm and zen-like, apply a small amount of lubrication to the part of the frame that goes down inside the door – I use WD40 or white grease. This will stop the frame from binding on the rubbers as it goes through.

12) Gently feed the quarter light frame through the rubbers and into place. Be careful not to break the window inside the door! Use a flat head screwdriver to gently straighten out any folds in the rubber and ease them into the right place. Make sure the ends of the rubber and chrome trims are in the correct position, and then push the quarter light home.

13) Replace the screw in the top of the door and the bolt at the bottom of the quarter light to secure it, and put the last felt channel retaining clip in place. Replace the felt channel, or fit your new one if you are replacing it. Push it firmly into the retaining clips and you should hear or feel it click into place.
14) Another fiddly bit! Have another brew if needed and although you can do this alone, if you have a mate who doesn’t mind helping, this will be easier with a spare set of hands. Carefully lift the glass back into the window mechanism. You may need to use the trim tool or a screwdriver to move the inner edge of the rubbers aside from above so the top of the window doesn’t get caught on them, whilst lifting the glass from the bottom. Prise the rubbers apart and look down inside the door to make sure the edges of the windows are in the felt channel one side and the felt channel on the quarter light side.
 15) Loosely do up the bolts that hold the window to the winder mechanism, and then gently wind the window completely up. Now tighten the two bolts through the round holes at the top of the door. This should mean the window is correctly aligned, but gently wind it up and down a couple of times to be sure.
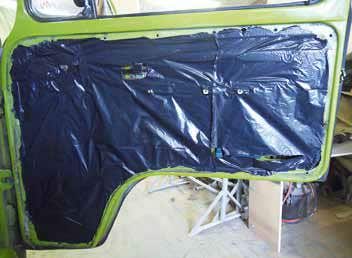
16) This is a good time to replace the plastic sheet that protects your door panel. I use a heavy duty bin liner! Use spray glue to attach the new plastic sheet and cut it to fit the door card recess. Cut small holes for the screws and fittings and around the panel clip holes.


17) Replace the door card, pushing all the panel clips firmly in place. You can change any broken clips or rubbers whilst doing this. Then refit all your handles, winders, speakers and door pulls. Done!