How-To Videos

Just Kampers - Part Of The VW Community Since 1989

JK have produced a number of straightforward video guides to help keep fellow VW enthusiasts on the road. From simple jobs like Changing Wiper Blades or Replacing the Fan Belt through to Brake Replacement and all the way on to Fitting an Engine the videos cater for all skill levels.

If you're planning some work and would like a specific video guide to help please get in touch with JK.

  •  Getting Your VW T25 Prepared For Winter

    Getting Your VW T25 Prepared For Winter

    Prepare your VW T25 or T3 for winter with this essential how-to video. Learn the best practices for winter preparation to protect your Volkswagen engine from cold weather. The video covers critical steps, such as checking coolant levels, ensuring proper antifreeze mixtures, and inspecting belts and hoses for wear. Following these tips will help keep your engine running smoothly during the winter months, reducing the risk of breakdowns and prolonging your vehicle's life. Watch the video now to make sure your VW is ready for winter.
  •  How to keep your VW stored safely during the winter

    How to keep your VW stored safely during the winter

    Prepare your VW Bus or Beetle for winter storage with this helpful how-to video. Whether you own a T2 Split, Bay Window, or another Volkswagen, this video covers essential tips to ensure your vehicle is protected throughout the winter months. Learn how to use an instant garage to shield your vehicle from the elements, as well as key maintenance steps like cleaning, topping off fluids, and battery care. Preparing your VW can help preserve its condition and performance for when it's time to hit the road again. Watch the video now for expert advice!
  • How to upgrade the dip beam bulbs on your VW T5 or VW T6 Transporter

    How to upgrade the dip beam bulbs on your VW T5 or VW T6 Transporter

    Here we show you how to upgrade The Dip Beam Bulb On Your VW T5, T6 Or T6.1 Transporter. To find out more about our VW lighting upgrades visit visit our VW Lighting Upgrades PageHow to upgrade the headlight bulbs on your VW T6 We’ve put together this quick guide to help you upgrade the head lights bulbs on your Volkswagen T6. Upgrading your headlamp bulbs can significantly improve visibility and safety, especially during night-time driving. While the inner bulb serves as both a day running light and high beam, it's the outer bulb, responsible for the dip beam, that we'll be upgrading for improved illumination. In this guide, we'll walk you through the process of fitting upgraded headlamp bulbs to your T6.1, ensuring a hassle-free installation and optimal results. Step One: Accessing the bulb Start by popping the bonnet on your Transporter and locating the wire clip, near the back of the headlamp unit. Pull up on the wire clip to release it, which will allow access to the bulb compartment.Remove the protective cover by gently pulling it off from the top. Take your time, and be cautious not to damage the cover. Step Two: Removing the old bulb Once this cover is removed, carefully detach the bulb from its plug by gently pulling it out.Avoid touching the glass part of the bulb to prevent leaving grease traces. Even if you’re not planning on using the old bulb again, it’s a good habit to get into. If needed, wear gloves for added protection against touching the bulb's surface. Step Three: Installing the upgraded bulb Take the upgraded bulb and insert it into the plug, ensuring a secure connection. Again, make sure you avoid directly touching the glass part of the bulb. Carefully plug the bulb back into the socket part of the plug, making sure it aligns properly.Check the bulb's positioning using a mirror and a light source if necessary, to ensure it's correctly seated at the top. Step Four: Securing the new bulb Once the new bulb is in place, reattach the protective cover by aligning the two feet with the corresponding openings on the bottom of the headlamp unit.You may well need a torch so you can see better, when you get to this step! Lift the wire clip back up and close the little door to secure the cover in place. Step Five: Final checks Double-check that both bulbs are securely fitted, and the wire clips are properly closed.Turn on your vehicle's headlights to ensure the upgraded bulbs are working properly and lighting up as they should. Congratulations! You've successfully upgraded the dip beam bulbs in your VW T6.1 headlamp unit. Enjoy the noticeable difference in brightness and visibility during night-time driving.For more useful tips and guides for your VW T6, be sure to follow us on YouTube, Facebook, and Instagram. Visit our website at justkampers.com for a wide range of VW T6 accessories and parts.T5 & T5.1 Lighting{{widget type="Magento\CatalogWidget\Block\Product\ProductsList" template="Magento_CatalogWidget::product/widget/content/grid.phtml" anchor_text="" id_path="" show_pager="0" products_count="10" condition_option="sku" condition_option_value="J13803, J16662, J41822, J11565, J29266, J16991, J45774, J45775, J29066" type_name="Catalog Products List" conditions_encoded="^[`1`:^[`aggregator`:`all`,`new_child`:``,`type`:`Magento||CatalogWidget||Model||Rule||Condition||Combine`,`value`:`1`^],`1--1`:^[`operator`:`()`,`type`:`Magento||CatalogWidget||Model||Rule||Condition||Product`,`attribute`:`sku`,`value`:`J13803, J16662, J41822, J11565, J29266, J16991, J45774, J45775, J29066`^]^]" sort_order="position_by_sku"}}T6 & T6.1 Lighting{{widget type="Magento\CatalogWidget\Block\Product\ProductsList" template="Magento_CatalogWidget::product/widget/content/grid.phtml" anchor_text="" id_path="" show_pager="0" products_count="10" condition_option="sku" condition_option_value="J13803, J11565, J41821, J42747, J41822, J42276, J43373, J48162, J48163" type_name="Catalog Products List" conditions_encoded="^[`1`:^[`aggregator`:`all`,`new_child`:``,`type`:`Magento||CatalogWidget||Model||Rule||Condition||Combine`,`value`:`1`^],`1--1`:^[`operator`:`()`,`type`:`Magento||CatalogWidget||Model||Rule||Condition||Product`,`attribute`:`sku`,`value`:`J13803, J11565, J41821, J42747, J41822, J42276, J43373, J48162, J48163`^]^]" sort_order="position_by_sku"}}Did you know that our colleagues at Just Kampers Insurance have been offering specialist vehicle insurance since 1998?You can get a great deal on insurance for a huge range of vehicles, from daily drivers to treasured campervans, and everything in between. Just Kampers Insurance works with a huge network of insurers to find you the best deals, and they're so confident that they'll send you a £50 Just Kampers gift voucher if they can't beat your like-for-like quote!Get an Online Insurance Quote Today{{widget type="Magento\Cms\Block\Widget\Block" template="widget/static_block/default.phtml" block_id="232" type_name="CMS Static Block"}}
  •  How To Replace The Front Brakes On Your T25

    How To Replace The Front Brakes On Your T25

    Mark shows us how to upgrade the front breaks on a T25.
  • How to fit the JK Chairpod Solution

    How to fit the JK Chairpod Solution

    After many iterations and product testing, our own Just Kampers Chairpods are finally here, and we’re really pleased with them! Camping chairs are just another thing to remember on your camping trip and a way to keep them tucked out of the way would be great. Our new Just Kampers Chairpod system is a neat, tidy and reliable way to store your camping chairs and keep them out of the way. They’ll be there when you need them, but won’t get in the way or rattle around in the back of your VW T5 or T6.
  • JK Guide: How to fit gas & water into your campervan conversion.

    JK Guide: How to fit gas & water into your campervan conversion.

    Mark shows how to fit gas and water into your campervan conversion.
  • How To Check Your VW After Winter Storage

    How To Check Your VW After Winter Storage

    Mark shows us what you need to check after storing your VW for the winter.(00:00) it will soon be time to retrieve our classic car from its winter storage in this video I'm going to run through a few checks we need to do before we take our beloved classic back out on the road during storage our tires have been set to the maximum pressure to prevent them from going out of shape so the first thing we need to do is set our tire pressures correctly, remove our wiper protection and check condition, reset and reconnect our battery, check our brakes are free and not binding on, carry out a full light check. (00:47) All of our flexible brake hoses for any signs of rodent abuse, check our engine oil for level and condition we know when we put it away we put it away out to its maximum mark and clean. If we've gained any level, there's a possibility that the fuel pump may have leaked into the sump. Check our HT leads and rubber pipes again, we're looking for signs of rodent abuse. Then pop in some fresh fuel, check the brake fluid level and refill our washer bottle. Restarting your vehicle for the first time after storage may take a little (01:36) while this is actually a good thing because it will allow the chance for the oil to get around the engine before it fires up, it would take a little while because we need to refill our carburettors, get some fuel into the engine before it actually fires. Enjoy your classic car Adventures soon, thanks very much for watching.
  • How To Repair Your Vehicle Dents At Home

    How To Repair Your Vehicle Dents At Home

    Have you spotted dents on your vehicle? Mark is here to help with some dent removal tips. (00:00) Looking after our beloved VWs takes quite a lot of effort with the servicing the cleaning, keeping everything up together and then you notice that horrible bodywork dent that really annoys you and all you think of is expensive body shop repairs. Well let me tell you, there's a process called paintless dent repair. It doesn't have to be expensive, as you can see here, this T25 has got a dent in the rear quarter panel. If I move the camera up and down, you can just see it appearing here, it's quite annoying it's quite a soft (00:30) dent so it should be fairly easy to remove it's about two inches long by about an inch wide I fitted my line board to the side of the vehicle and I should be able to show you much more clearly now where the dent is watch this so as we come up there it is it's appeared just here so this is the dent we're going to remove so the first thing your local dent technician will do will make sure that they can get to the area of the damage and make sure they can get their Tools in at both ends of the damage so here I've managed to get access through our (01:00) rear quarter panel here so remove the trim and I can get down through and I've checked with my tool I can get in and I can get to the start of the dent and the finish of the dent that means I can move right the way across the damaged area so with my line board set up I can get the tool in position and I can see exactly where the tip of the tool is and actually start working that dent and slide in position. I'm going to start at one end and work my way through, so I'm going to start on this area here and push the dent out (01:28) across from that way so I'm taking great care not to over push the dent. We need to stretch the metal back into position, so I need to go past its uh flat point and let it relax back if that makes sense so again we don't want to over push it and end up with an outy dent although we can deal with those as well we don't want to make the repair more difficult than it is as you can see we've only got a really tiny little ripple left now so I'm going to work that with a the fine tool still and see if we can get those last little bits out (01:59) We're back with the line board in the horizontal plane when we first originally looked at the dent as you can see now the dent is gone there's a tiny little bit of imperfection in the paint now, not in the metal work it's actually in the paint so I'd have to flat and polish that off to get that 100 perfect but I think that's like a 98 repair let's paint this stem repair if you've got any of those niggling bumps and dinks that'll really annoying you get them fixed it's not that expensive look up your local PDR technician and (02:33) get them repaired. I've got a few more to do, so I'll see you next time. Be sure to follow us on Facebook, Instagram and check us out at JustKampers.com. Thanks for watching.
  • How To Check A Beetle After Driving It Through Winter

    How To Check A Beetle After Driving It Through Winter

    In this video, we show you how to properly check your Beetle after driving it through the winter months. From inspecting the exterior for salt damage to checking the engine for any issues caused by cold weather, we cover all the essential steps to ensure your Beetle is in top condition. Join us as we guide you through the process of winter maintenance for your beloved Beetle. For more tips and advice on caring for your classic car, visit Just Kampers website today.
  • How To Make Your VW Show Ready!

    How To Make Your VW Show Ready!

    The Best Way To Clean Your VW - JK GuideMark shows us the best way to clean your VW. Removing all the grime & giving it that extra sparkle!(00:00) Welcome to Just Kampers, in this video I'm going to go through a few basic cleaning and detailing tips, so the first thing I've done is rinsed off the van I've rinsed off all around underneath the wheel arches and off of all the loose dirt around the side, get that removed first and then we'll make sure we've got two buckets, one bucket for soapy water and one bucket for clean water and one sponge. My bucket of soapy water with our car shampoo is obviously for cleaning the van, a bucket of clean water is for rinsing our (00:27) sponge this helps prolong the life of our soapy water for as long as possible, also helps us prevent putting grit and dirt back on our panel, so that's the van washed and dried. You may think that's it finished, further work to do on some of the panels .I can still feel some roughness and that's ground-in dirt or Fallout that's actually attached itself to the paintwork so the way to remove that is by use of a clay. So I've got a small piece of clay here, I'm just going to use a squirt of lubricant on the panel and then I'm (00:59) going to rub the clay across the panel and this will pick out all the dirt and Imperfections off the top of the paintwork you can actually hear it picking up the dirt you just have a little fill to fill it's nice and smooth nice and smooth this will also help pick off um tar residue as well over what we thought was a clean panel just picked up a load of dirt so now we use a compound or a polish, so the difference between polished and wax polish has an abrasive in it, wax is just a nice shiny coating so we need something with a bit of cut in it with a (01:39) bit of abrasiveness and this will help take out some of the marks that possibly the claying has left in we can now buff that compound off or polish. Next stage is to apply a wax now we let that dry off and haze up and then we can buff that off we continue that process panel by panel all the way around the van. We'll end up with some really beautiful smooth paintwork and sealed in with a nice wax and that will help prevent the water and the dirt sticking to it. so next time we wash it you'll notice how easily everything beads off of it.
  • WHY you should MOT & service your classic car

    WHY you should MOT & service your classic car

    Mark shows us what you need to check & look out for when preparing your classic VW for a MOT.(00:00) So behind me on the ramp I've got John the architect's car, this is a 1970, 1600 Beetle. He uses his car on a daily basis and today I've got it in the shop and we're gonna go run through and do a full service on it and the idea of that is to show you guys at home what's entailed in doing a full service, so next time you can take your classic VW to your classic specialist you'll know what he's doing. So, the first part of any service is to drain the engine oil, it's the first thing we do and generally the last thing that we put back in after the service so, (00:30) during the entirety of the whole service I will leave this drain in, so we get the maximum amount of dirty oil out, you can also use a bit of clean oil to go in through the top just to pull out that last bit of dirty oil so we'll probably do that as well as you can see I've got the drain bung out and the oil's drained the next thing is to actually take down our oil strainer which is here which is it held in with these nuts here, so that's our next job and then we can let the rest of that oil drain. (01:02) So with the cover removed, I can now remove the actual oil strainer. We've got a gasket here, and I can tease it out with a screwdriver. I'll work my way around. We should take our oil strainer out. We can either clean these oil strainers out or just replace them and with a special hex tool, I can undo our gearbox drain and drain our gear oil. Now I can leave that draining while I carry on with the rest of the service. As you can see, I've got the front brake (02:19) stripped out in fact, I've got all of the brakes stripped out all the way around, so going back to this front brake it wasn't working very well, so John was complaining of a pull to the right. We only had one brake shoe this side working because the wheel cylinder is seized apart from its bottom piston. Actually, works on the other side it's worse the wheel cylinder is seized on both Pistons, so that wasn't working at all. So out of the four brake shoes on the front John only had one working. The rear shoes have been doing over time (02:48) to obviously compensate for the front brakes not working and I'll show you what's happened to those so when I got to this offside rear brake drum, and I went to remove it I couldn't actually get the hub nut undone so it just goes to show these brakes probably haven't been apart and looked at for some time hence them not working very well. I actually had to cut that hub nut off in the end, it was so tight that it snapped the knuckle on my breaker bar and even with our big knocker gun, it still wouldn't come off, so I had to use an angle (03:16) grinder so it should have looked like this but by the time I finished it looked like this so this is our torque tool for undoing hub nuts, check this out, obviously we know the hub nut on a beetle on the rear is really tight, so I've got a ratchet goes into this part it's 11mm drive basically what we're doing is we're driving the force we put here is 10 times by the looks of it, and I can see the hub nut is starting to undo as we're walking around the tooth section well I'm quite impressed, that's really good I've never used one of these tools (03:56) before, that works a treat, that's better than breaking your bar and that can actually undo that with my ratchet now, yeah so that's a really cool Tool uh to buy they're around about 130 pounds if you're doing a lot of these or if you own ones that you can take the drums on off plenty of times that is really easy so these are all our brake parts on the bench Now alarm Bells did ring when I took the drum off the front this side the reason being there was no brake dust inside the reason there is no brake dust inside (04:28) because that's these wheels and all that and obviously the shoes haven't been doing anything for a long time so they're in the front brake shoes the rear brake shoes I've been doing all the work and as you can see they've overheated and actually cracked on both bits on both shoes same with the other side on the rear so these shoes are basically overheated and uh the lining is cracked so they're no good the rear drums were full of brake dust obviously because they were the only ones that were part working this side we only had one brake shoe (05:05) working so again one brake shoe was cracked because it's overheated compensating to try and stop for the whole car so we're going to replace all the brake shoes and all the wheel cylinders also I noticed that the flexible brake hoses are fairly old too one was rubbed through on one side so we're going to change all four of those two so this part of the service our brake inspection so far we're about two and out of Two and a bit hours in I think just on the brakes I haven't touched the engine yet apart from drain the oil so this brake (05:34) issue highlights why it's so important to have your car MOT’d even though your classic cars exempt from mot are a really good idea to get it tested and checked on a yearly basis so this side of the rear brakes is complete got a brand new flexi hose up there brand new set of brake shoes and obviously a brand new wheel cylinder so these are going to work really well now I've just got to go and do the other side  sponsor brakes we're all back together I was able to adjust them all and then bleed the system (06:15) foreign the next stage was to remove that steering arm with the broken dust boots once the steering arm was on the bench it was really easy just to swap the boots over with a nice new fresh ones  the steering Armory fitted that was our steering completed next onto greasing the front beam which is very important a lot of people seem to forget that that front beam needs grease next was to fit a brand new oil strainer and I made sure the surfaces were absolutely as clean as I could make them before I refitted (06:49) the first thing I need to do is get our valve clearances done I've removed the spark plug so it's easier for me to turn the engine over the valve clearances weren't too far out it was definitely worth doing because some were a little bit out of Tolerance but it was also really worthwhile to clean those rocker covers up and fit brand new gaskets as the previous ones were leaking also I'm going to take a look inside our distributor and see if we need a cap and a rotor arm I think we probably do uh yeah we're gonna put a new cap on (07:26) that you can see that it's quite corroded on the terminals rotor arm while we're here it makes no sense not to do it we're going to put a new set of points and condenser on foreign serviceable item to do it's not too bad but I think let's start with a fresh one we're going to get our air filter oil bath off too for a clean out  so this air filter is an oil style bath air filter and what that does is the oil that's inside in the bath actually traps all the dirt and prevents it from going inside the engine so it needs to be (08:07) changed fairly regularly so let's have a look as you can see the oil is fairly dirty so the oil has done its job and tracked all that dirt and prevent it from going into the engine so we need to clean this out make it nice and lovely and clean and fill it with fresh oil so I oh bath is nice and clean I've given that a good clean round got rid of all our dirty old oil the ghouls part of the air filter which is in here I've given that a good wash through too with some Degreaser that's dry so we need now is just to fill with some fresh oil so (08:35) I've got 400 mL of fresh oil so we can pop that straight in the oil bath so our old bath is all back on up here our next step is the ignition side of it so I'm going to go through our distributor do our points condenser distributor cap and rotor arm and a nice fresh set of spark plugs then we can put up a drop of oil in it and then I'm going to change this fan belt and then we're ready to go so the easiest way to do our points and condenser is I'm just going to take the distributor out and do it on the bench (08:59) and then I can check that all of our four points of our cam are working greatly  the new set of points fitted to our distributor I'm just going to test them and make sure that they work because I have put points in before and we haven't had any continuity and then the car won't start so it's always good to test it on the bench before you put it back in so we're just going to test continuity between Earth and the points themselves and then I can turn off and you can hear the beep my meter so I should get four beeps that (09:41) means that we've got four points of contact on our camshaft on the distributor camshaft sorry the cam lobe and that opens and closes our points  foreign   just remember spark plugs don't always come with the correct Gap so this should be checked and adjusted and nothing wrong with a little drop of anti-seize Grease  thank you so to summarize this full service and inspection that we've just carried out in this 1970 Beetle obviously I started by dropping the oil for First Service (10:45) item to do and then stripped out all the brakes to take a look and we found that the brakes were absolutely shot so the brake components we've replaced with Flexi hoses wheel cylinders and brake shoes on the front and the rear all the way around it'll flush through with brand new brake fluid on the front end we had a couple of little issues we had a little bit of play on the steering and that was down to the steering box and the arm that the Pitman arm is actually attached to the steering box it wasn't shimmed there should be a shim between (11:14) the two and that stops the Pitman arm rising, so I've re-shimmed that so that's controlled our movement side to side also I noticed that the actual dust and dirt boots on the tracker lens have all split so remove the arm and replace the boots and once the engine was Stone Cold I was able to carry out the valve clearances and then refit those Rocker Box covers with some fresh gaskets and to finish off the engine service item things we've replaced the spark plugs distributor cap rotor arm a fresh set of points and condenser In Here Also we (11:44) gave the air filter all bar some fresh oil give that a good clean out and we fit in some nice new air hoses too finished off with a fresh belt and of course refilled our engine oil and gearbox oil so our final piece of this service is to get the beetle down the floor and give it a run down the road and get those new brakes bedded in so that was test drive done all went really well pedal fills the brake pedal feels really nice John's got some brakes now I just had to adjust the idle speed when I've come back just because it's (12:30) warmed up and where I've readjusted the ignition time and so forth but now it's lovely and I think now definitely deserves a good wash  so I hope you can see from the amount of work that we've carried out on this 1970 Beetle how important it is to get the car service regularly but most importantly mot tested every year even though these classic cars are MOT exempt this is a prime example of why it's a good idea to get them tested for whatever it costs 50 pounds to get your mot tested and that would have (13:00) highlighted our brake problem a lot earlier, so the message from this video is get your car serviced, get MOT’d every year, get out and enjoy that sunshine as the spring's just around the corner and thanks for watching.
  • How To Refresh Your T2 Exhaust System.

    How To Refresh Your T2 Exhaust System.

    Mark shows how to refresh your VW T2 Bay Window Exhaust system.
  • How to fit a 12v Hard Hot Start Relay Kit

    How to fit a 12v Hard Hot Start Relay Kit

    Mark shows us how to fit a 12v Hot Start Relay Kit.(00:00) Welcome back to Just Kampers, in this video, I'm going to show you how to fit a hard start relay, also known as a hot start relay. This relay helps to protect the ignition switch, as these vehicles get older the ignition switches become a little bit more worn, the resistance increases on the electrical part in the back and we don't always get the full 12 volts back to the starter motor to engage the solenoid correctly, so we put this in line at the back and that helps to protect our switch when you find your classic VW is getting (00:32) difficult to start. I.e. you turn the key and all you get is a click at the starter motor and the starter motor doesn't actually engage to start the engine. It's more than likely that it's the ignition switch itself not necessarily the starter motor that's at fault, obviously we would need to check everything first, the easiest way to do that is to use a voltmeter and actually measure our voltage at our starter motor from our ignition key, we should be supplying a full 12 volts to that, if we're not that's probably why, usually (01:02) because as I said before the ignition switch becomes worn and the resistance increases, so this is our key switch here we would turn this switch and that would give us 12 volt supply right the way around directly to the starter motor to engage it as this becomes worn the resistance increases, we could only be delivering possibly nine volts to that starter motor solenoid and that won't actually allow the starter motor solenoid to engage correctly and let the starter motor do its work. So that's why we fit one of these (01:33) hence the diagram so, this is our four-pin relay, our hard start relay or sometimes called hot start relay very, very easy to wire up. There are only four terminals. Although this looks quite complicated, it's actually very easy, so our relay here we have a terminal 30 a terminal 86 at 87 and an 85. Terminal 30 is the live feed from the battery now, we've taken that from our battery feed at the starter motor itself as you see I've done our battery, which is our main feed to our starter motor, and we've hooked into that and gone to terminal (02:11) 30. terminal 86 is from our ignition key switch now this relay doesn't take a lot of load to switch so we won't be experiencing the problems we would if we went directly to the starter motor loss of voltage this key switch even though it's worn will still supply enough current to switch our relay 85 we take that directly to Earth that's normally to chassis somewhere nice little dub of grease on there just to protect it from the corrosion from the weather terminal 87 is our output from our relay which goes to our starter (02:44) motor solenoid and it's a small lucar terminal on the solenoid and that will then trigger that starter motor and allow the vehicle to start so looking at our starter motor here this little red wire here that comes from our hard start relay this is from terminal 87 and that goes to our lucar terminal up here just there on our starter motor solenoid now this one here is the main battery feed so that's our yellow wire which goes to terminal 30 on our relay this wire here comes from our key switch and originally went to our (03:21) terminal where our lucar terminal is up there on the starter motor solenoid this now goes to terminal 86 on our relay then lastly terminal 85 we just take to Earth that's our relay fitted and screwed to the chassis underneath we did a separate Earth as well a little dob of copper grease on there to prevent the corrosion taped up the wiring [Music] and tidied up all the way up to the starter motor if you are experiencing that intermittent clicking fault at the starter motor we just want to protect and prolong the life of your ignition (03:55) switch then our hard start relay kit is definitely the way to go. For more how-to videos, follow us on YouTube, Facebook, Instagram or visit us at JustKampers.com. Thanks for watching.
  • How to fix a Beetle oil leak & clutch replacement.

    How to fix a Beetle oil leak & clutch replacement.

    Mark shows us how to fix a Beetle oil leak and how to replace the clutch. (00:00) Welcome back to Just Kampers. Now today I'm going to be investigating an oil leak on a 1967 Beetle. So I took an initial look and there seems to be quite a lot of oil around the oil switch, so I cleaned it up,  we've replaced the oil switch and then we still had oil emerging, so a closer look I could see the oil running down behind the fan cowling and onto our engine assembly so unfortunately it's engine out because I think the oil leak's coming from inside the fan housing. The only thing inside the fan housing that can cause (00:34) our oil leak is the oil cooler, so that's where we're going to start. So I'm going to take the engine out so our engines removed and our fan housing is removed, now it's really simple to remove these engines from the car they're only held onto the gearbox via four studs, so we have one either side at the top a stud comes through here and here with a 17mm headed nut and washer so we remove those and you can gain access from behind our fan cowling when it's in situ. There's two studs that come through here and they protrude through our gearbox (01:13) bell housing again with a 17mm headed nut and a washer on there. The next thing to remove would be our heater cables so we have ones one each side remove and also remove our heater ducting, then all we have left is our fuel pipe so we disconnect him from our fuel filter and that's pretty much the back end done. Then as we come back around to our engine bay side remove the front part of your tinware, then we have wiring that comes across to our alternator, which would be situated here again. Undo the wiring, just move it (01:48) out of the way, disconnect the battery first obviously, because you have a live there there's a throttle cable that comes through our heater through our fan cowling to our carburettor so we remove him and withdraw him from behind and there's a conduit that goes through the fan housing so we pull that out too with the fan and remove. I can gain access to our oil cooler, which is situated here now, as you can see it's pretty oily, and we've had oil leaking out of this oil cooler and running down this side and running down this side too that was (02:22) where I could see the oil leak from when it was in the car, so I'm going to remove this and have a look and see why it was leaking. I've undone the nuts there's a nut at the front there and then there's two further around the back underneath, I've undone those too, so let's get the cooler off and see why it was leaking I know we have left is our oil switch wiring so we disconnect our oil switch wiring, pull him out and then our ignition feed to our coil and that's it for wiring and then we can wiggle him out, so we gently start (02:56) pulling them forward and drop him down, he can do that on either we've got a stand with some wheels on it goes up and down or you can use a trolley Jack. I've cleaned and checked our oil cooler and I'm really happy with the cooler itself and that we found the leak at the seals so you can test these yourselves, or you can send them away to get them tested you can fill them with compressed air and see if they're leaking again can be quite difficult if you're in any doubt whatsoever then just replace your oil cooler there's no point putting back (03:31) an oil cooler that could potentially leak so I've left this training for some time and it's nice and clean and it's not leaking, so we can get this back together with our fresh seals all nice and clean and ready to put our fan housing back on just disconnect these HT leads and get these out of the way first, so take a bit of clearance sliding over our oil cooler and get our alternator past the carburetor. Making sure our tinware goes the right side so there's two fixings on either side that goes through the tinware with a (04:26) captive nut and then there's this clamp this clamp goes around our alternator and to the alternator pedestal so we just slide that back now I can do that up [Music] one thing is worth a mention is these warm-up flaps now these have been disconnected so they're left open all the time but yours you may still have your control rod and your bellows that controls these warm-up flaps. Now, if you have,you'll have to disconnect your bellows from underneath. It'll be situated under here with a 13mm headed bolt, you'd have to undo that before you (05:22) could take your fan housing off so while our engine is out I'm going to replace the clutch, so I've got our special tool in here which bolts through and holds our flywheel in place if you haven't got a special tool then you can use like a bent valve or something else to jam in between the flywheel and say the lower stud for instance that just keeps that solid so I can undo the clutch. Now our clutch assembly is removed, we can take a closer look at our flywheel, make sure we haven't got any high spots (06:03) make sure we haven't got any cracks give it a good clean up before we fit our new clutch [Music] first thing I'm going to do is speed a little bit of Grease into our spigot bearing not loads of Grease because we don't want it flung everywhere all over the clutch a little tiny bit on my finger I'm just going to work that into the bearing it's a roller pin type bearing so it needs a bit of lubrication in there so okay that's the grease done okay let's get our clutch kit on so our center plate it does only go one way and (06:40) actually written on the front of the clutch here it says gearbox side so gearbox size this side, so it's going to fit in there like that we're going to loosely put the bolts in (07:46) now I'm not going to put any pressure on this pressure plate yet I'm literally just one in the boxing so they touch because what I want to do is be able to center our center plate using a clutch alining tool and then we can tighten up around the outside, clutch still moves yeah okay so we slide our clutch aligning tool in, now our clutch aligning tool will locate with the bearing in the back and locate with the center friction plate and line up there we go lovely so that's it so that's our clutch centered and now we can do up around the (08:51) outside, we need to keep it nice and even so if you want to you can use a torque wrench or you can do it by hand the last piece of our clutch puzzle is our release bearing now I put a little bit of copper grease on the ears here where it sits and on our splines the release bearings held on with a clip a sprung type clip see if I can show you this side so we've got one side in the side pushes in and then just simply twist it round the back and it clips into place just double check this in the right place yeah it looks good (09:56) with our oil cooler seals replaced, my new clutch kit on, release bearing on the car, we're ready to put the engine in, well that's that job finished. Road tested leak-free, very pleased! For more how-to videos or hints and tips visit us at JustKampers.com or follow us on Facebook or YouTube.
  • How to change a shock absorber on your VW T6 Transporter

    How to change a shock absorber on your VW T6 Transporter

    Mark JK's Mechanic shows us how to change a shock absorber on a VW T6 - T6.1 Transporter. To find out more about Front Transporter Shock Absorbers visit our Front T6 - T6.1 Shock Absorbers page.How to Replace the Front Shock Absorber on Your VW T6 We’ve put together this guide on how to replace the front shock absorber on your Volkswagen T6 or T6.1 Transporter. It’s not as daunting as it may seem, if you’ve got the space, tools, and experience needed to take the task on. We’ll walk you through the process of replacing your front shock absorbers, just like Steve the chippy did for his trusty van. Step 1: Getting everything ready Start by removing the wiper blades and scuttle underneath the windscreen to access the top mounts for the suspension strut.Secure the wiper blades' positions so you can make sure they go back into the right place. Step 2: Removing Components Next you’ll need to remove the wiper linkage and motor, and then gently pry away the scuttle so that you can fully access the suspension strut's top mounts. Step 3: Loosening the strut assembly Now you can remove the cover for the top of the strut and loosen the top nut with a suitable tool. Clean the area around the strut to make sure that it’s easy to get everything apart and back together again. Step 4: Removing the brake components It's now time to remove the brake caliper and carrier, the brake backing plate, and brake disc. All of this needs to come out so that you can access everything you need to. At this point you can use some grime penetrating spray and a wire brush to clean components, too. Step 6: Removing and replacing the shock absorber You’ll need to disconnect the ball joints, track rod end, and hub nut to free the shock. Carefully take the shock absorber assembly out, and then line up the replacement unit. Take the time to check that everything is properly seated and aligned before you continue. From here it’s really just a cause of following the previous steps but in reverse, until you’ve replaced all of the parts and components which you’ve removed. Take your time, and make sure that everything you’re putting back on is in good condition, properly secured to manufacturer’s specifications, and working correctly. Make sure you clean and degrease the brake components before you reinstall them, to make sure that everything is working correctly. Once you’ve reattached the brake components, put the strut cover back in place, and fitted the wiper motor, linkage, and other parts, you’re basically done! Congratulations! You've successfully replaced the front shock absorbers on your Transporter! That wasn’t so bad, was it? Products seen in this video{{widget type="Magento\CatalogWidget\Block\Product\ProductsList" template="Magento_CatalogWidget::product/widget/content/grid.phtml" anchor_text="" id_path="" show_pager="0" products_count="5" condition_option="sku" condition_option_value="J19166, J19168" type_name="Catalog Products List" conditions_encoded="^[`1`:^[`aggregator`:`all`,`new_child`:``,`type`:`Magento||CatalogWidget||Model||Rule||Condition||Combine`,`value`:`1`^],`1--1`:^[`operator`:`()`,`type`:`Magento||CatalogWidget||Model||Rule||Condition||Product`,`attribute`:`sku`,`value`:`J19166, J19168`^]^]" sort_order="position_by_sku"}}Did you know that our colleagues at Just Kampers Insurance have been offering specialist vehicle insurance since 1998?You can get a great deal on insurance for a huge range of vehicles, from daily drivers to treasured campervans, and everything in between. Just Kampers Insurance works with a huge network of insurers to find you the best deals, and they're so confident that they'll send you a £50 Just Kampers gift voucher if they can't beat your like-for-like quote! Insuring your vehicle with Just Kampers Insurance also gets you a 10% discount on orders here at Just Kampers, which could save you even more money!Get an Online Insurance Quote Today{{widget type="Magento\Cms\Block\Widget\Block" template="widget/static_block/default.phtml" block_id="232" type_name="CMS Static Block"}}
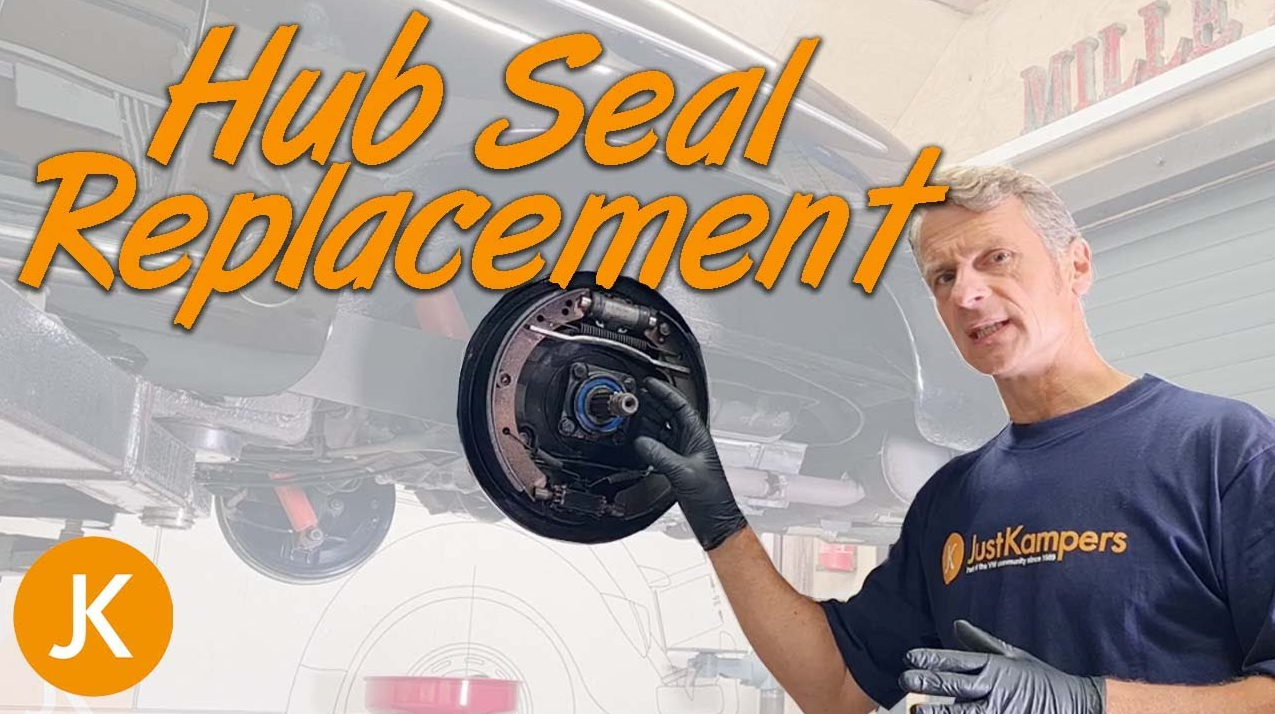
  • How to replace a Hub Seal for a Beetle/Porsche 356

    How to replace a Hub Seal for a Beetle/Porsche 356

    Mark shows us how to replace a Hub seal on a Porsche Speedster. Also can be done on a Beetle and a T2 Split.(00:00) Welcome to Just Kampers. In this video, I'm going to show you how to remove and replace a rear hub oil seal. Now this oil seal is on Porsche Speedster, but it is exactly the same as the VW Beetle/T2 Split, as you can see i've already removed the rear wheel and the brake drum, to remove the brake drum you need to remove this center hub nut, now on the Porsche they're very tight so this is 400 foot pounds i believe, and on the beetle it's 217 so, you may need some help in removing this nut as you'll probably need somebody in the car with the vehicle on (00:36) the ground, rear wheel still on. Remove the hubcap, then you remove the split pin and then you'll need a big bar, and you'll need to have the person with their foot on the brake and undo that hub nut. Now I can see that the oil has leaked past the seal and has run down the backing plate. Fortunately, oil hasn't spun all over the brake shoes. In some cases, when they leak particularly badly, it goes everywhere, and then you have to replace the brake shoes as well and remove everything and clean everything down but this is still (01:06) fairly clean uh reason this seal has leaked i don't know yet but we're going to investigate that now the reason i found it leaking was upon inspection i found a small little drip on the back of the back plate as i was looking underneath the vehicle so then i was like why is that there so hence why the drum came off and now we can see that our seal is leaking so i'll give you a close-up as you can see the axle oil has just leaked past that rubber seal not 100 sure why yet it could just be the seal that's failed or the (01:42) spring that's around the back of the seal falling off so the next thing we're going to do is remove that hub carrier i'm going to undo the four bolts that hold the carrier through the backing plate to the axle tube now they're 14 mil headed bolts and they're quite shallow so when you're on there with your ratchet you need to make sure that you're really square and you undo them nice and steadily if you find that they're really tight then use a longer bar and again steady the top of the bar as you undo it you don't want to (02:12) come off of that nut and then ruin the face of it because it's very shallow so we're going to undo that there will be some oil and hopefully it's going to run past it's not going to touch our brake shoes obviously if your brake shoe is already ruined it doesn't matter just undo it let the brake come out you can drain the oil out of the transaction if you want to first i'm not too worried the other thing you can do is lift our axle up with an axle stand with the vehicle on the floor just to try and get it more level so we (02:41) haven't got so much oil coming out i'm going to let the all drain out through there anyway it's not a problem and then we can top up afterwards so let's just check we can get these undone so they are fairly tight again i'm going to leave some pressure on here so we don't slip off yeah they're pretty tight okay [Music] next we're going to try and loosen this pub seal carrier now you can do that by rocking the back plate like so it should just gently come forward we're going to leave this place from there there goes that (03:22) i'm just going to move that round so it's draining past our break shoes onto the floor that's fine so we'll let that go and then we can inspect to see why this is leaked i'm just going to use a couple of our bolts to hold our backing plate in position as we are still connected to our hard brake line we need to be careful not to move it too much we do have a little bit of wiggle room but our copper pipe is still bolted into our wheel cylinder so we must be careful we don't want to move it too much and break that brake pipe if you're not (03:50) comfortable moving around with the brake pipe on there you can disconnect it and clamp off your rubber flexi holes to stop your brake fluid leaking and then you would have to re-bleed your brakes afterwards anyway so i'm just going to put a couple of these bolts in just to hold it in position so i can now get the rear o-ring out which is the seal which shields between the bearing and our seal housing so we'll see if i can move that up okay so that's our o-ring that goes around our back of our wheel bearing so we're going (04:21) to replace that anyhow so to move our bearing retainer which houses our inner o-ring i'm just going to give it a little light tap around the face to try and bring it away from the wheelbarrow you don't need much it's just a little tap [Music] that should have yeah it's brought it away from the world area so i can pull that off and have a look that actually looks very dry in there and the o-ring looks very dry so it doesn't look like we've been leaking all there so we need a little bit of further investigation to find out where the oil (04:54) was leaking from the bench as you can see there's like a seal holder with our seal in it and our special tool which is just the right diameter to fit around and sit on top of our seal and go through our seal holder so i'm going to give that a bit of a tap and get that knocked out and then we can have a look so with the seal now removed it actually looks really good and i think it was sealing really nicely around this face sort of around this face so i don't think that's our problem anyhow further inspection i did find (05:28) this little divot here on the back of us our holder now this little divot may have allowed the oil to pass the o-ring on this nice bright face here the o-ring sits between that and the actual um back of the backing plate through the backing plate sorry and actually onto the axle and it seals the oil stops the oil coming from in here outwards now i think possibly the o-ring wasn't getting compressed into this groove and the oil was passing through here and dripping down here and yes it's at the bottom so the bottom (06:07) of our seal holder which is where most of the oil was now as a possibility the oil was leaking through here and then getting picked up by the rotation of the drum and thrown around our seals it was a little bit misleading to start with i think um the other thing it could have well been leaking through the center of our oil seal so we're going to replace this oil seal anyway but belt and braces i'm going to gently polish this down to get rid of that little indentation because it's actually quite deep so it's going to take a little bit of (06:37) polishing and then we'll have a nice face again for the o-ring to sit up against and hopefully stop the leak so using a flat surface and a bit of abrasive paper i was actually lucky enough to be able to polish out that horrible divot line without taking too much material off so it's literally just very gently kept going until we got rid of our divot line and as you can see now we've got a beautiful bright face and that will allow our o-ring to sit up nicely and seal now to put the seal in i'm going to push it in from behind now the reason being (07:14) is that there's a lovely chamfered edge here so we're not going to catch the seal going in and damaging it at all if you try and put it in from the front it's got a real sharp edge so you could damage the side of the seal as we're pushing it in that way so i'm going to go in from behind like so just start off with my thumb so we can just start to put it in that's it there is a little tip you can use a little bit of brake cleaner which makes it slippery for a short period of time until the brake do it cleaner disperses and that might help (07:51) you put your seal in you could also use a little touch of seal around the outside of the seal if you felt like it was necessary if there was a small amount of damage on our holder then that's what i would do then we do have this tool which is just the right size to fit snugly around the outside at the back of the seal without damaging it and then we can start to just gently tap it home so just gently work our way around okay we're nearly there i'm just going to bring it forward so it's almost flush with the front (08:29) so what i've done i've pushed the seal through the back of the holder and it's now flush with the front and we know that that seals in nice and straight there's not going to be any problems with it being slightly uh off of straight line as it were now that's cool let's um let's get ready to put that back on the car i'm cleaning down with some solvent some brake cleaner you can get rid of all that gearbox all the left leaked out now it's not leaking first thing we're going to do put our washer on first must forget him (09:01) he's got gone first he just literally goes on up against the wheel bearing next thing we have is our little o-ring so this small o-ring goes follow us on after that washer that sits in our little chamfer of our bearing retainer so again we have to make sure we get this around the right way so that chamfered edge needs to go inward so i'm just going to put a little bit of grease on this to help help it sit in place and then when that's pushed up against it hard it's not going to pinch our o-ring it's going to actually allow the (09:36) o-ring to move slightly and sit in a nice a nice uh place and seal up just put a little bit of grease on that next one to go on is our big o-ring and this goes around the outside of our wheel bearing and goes through our backing plate and up against the actual axle um housing itself and then we put our seal housing back on that will actually squeeze between on that face there and through our backing plate onto our axle so let's get a little bit of grease on that too again the grease will just help it move in position and stop it getting pinched (10:15) it's a little bit more tricky because we've got our back plate floating again at the minute so it's like a little bit of in just kind of pushing past the back plate so he's behind so we do that with a little tiny screwdriver so we're being super careful because we don't want to get that any damage to that o-ring at all just pushing through the back plate our o-rings in our correct position on a beetle you'll have a shape housing which will meet the shaped gasket now this gasket fits on the back and the other one fits on the other side (10:59) of our axle that's on a beetle so we don't need these on our porsche a lovely clean face for that o-ring to squeeze up against now so here comes the fun bit we're going to undo the two blocks that are holding our backing plate in i'm going to wiggle this in position right way up and get some bolts in and we should be good to go you can see we have our inner o-ring just here in front of our washer at the back there it is there we've got our outer seal and obviously between here and the other side of our axle we've got our outer (11:42) o-ring so what we've got left to do is to put our bearing retrain retainer stroke spacer in here time to torque our bolts up these are 32 foot pounds or 43 newton meters again nice and easy good now that's that talked let's get that bearing retainer on and get it finished so next is our spacer or our bearing retainer it's got a chamfer on the front and it has a slight chamfer on the rear as well so you could put a bit of grease on here and i'll just help it slide over our new seal ah just gently lovely pushes into place (12:33) then once the drum goes on and our hub nut goes on that'll squeeze the bearing up nice and tight against our axle so lastly all we have left to do is tighten that hub nut luckily i've got my mate in the car to give me a hand he's got his foot on the brake and on the handbrake right there we ready to go so remember this is 400 foot-pounds pretty tight yeah there we go just put our split bin through it and we're all finished so that was how to remove and replace a rear hub oil seal for any more how-to videos visit justcampers.com or follow us on youtube or facebook.
  • How To Check & Replace a T25 Reservoir cap

    How To Check & Replace a T25 Reservoir cap

    Mark shows us how to check and replace a T25 Reservoir cap.(00:00) Welcome to Just Kampers. In this video, I'm going to show you how to check your cooling system header tank cap on a T25. First, we make sure the engine is absolutely stone cold, and then we remove the pipe that goes between our header tank cap and our overflow tank, and then we pick one of the big cooler pipes and give it a good squeeze. I can actually hear air coming out of the spout that's leaking. We don't want that, so we need to change that, so let's put our replacement cap on, we'll do the (00:33) same test, give it a good squeeze, and now I can't hear any air! The purpose of this header tank cap, is to regulate our cooling system's pressure as the engine warms up and our coolant expands it causes a rise in pressure, when it reaches one bar or 14.5 PSI, the valve in this cap will open and allow and flow into our overflow catch tank now when the engine is then switched off and allowed to cool the secondary valve in this cap will open and allow fluid to return back to our cooling system as you can see the black one on the left has (01:06) two visible valves now, these type of caps have quite a high failure rate, and then you see the new one has a different type of pattern, but it does still contain two valves. The new cap is a direct replacement, and it's made in Germany by a company called Blau, which actually manufactures for VW.  Follow us on YouTube, Facebook Instagram and check us out at JustKampers.com. Thanks for watching.
  • JK Guide: How to fit flooring to your van conversion.

    JK Guide: How to fit flooring to your van conversion.

    Mark shows how to fit flooring to your van conversion. (00:00) Welcome back to Just Kampers and project 2022 so in this video we're going to be fitting our flooring. So we've got our ply lining flooring that's going to go down and then we've got a vinyl that's going to go down on top of that so i'll run through how to fit the ply lining floor and then how to fit our vinyl on top of that. A real simple simple selection of tools we have today we have our drill and a 3mm drill bit we have screws to secure our ply lining floor down to our floor and we've got our adhesive that we're (00:28) going to use to glue our vinyl down to our wooden floor and obviously some brushes to be able to move this stuff around. So we've got our plier lining board it's a a 9mm thick ply liner as you can see we've got it cut to the exact shape of our van now we were fortunate enough to have an old ply lining board that we took out and used as a template and obviously we've just removed a little bit of extra to make room for our carpet now you can buy pre-cut flooring online or if you want to make your own template do it that way and (01:01) then buy your wood and cut it out for with it with your template that you've made. As you can see it's not fixed down so what we're going to do we're going to actually drill through our ply lining and drill through into our floor and then fix it with a countersunk screw and that'll be a nice flush fitting through the wood, and then once we've done all the way around, obviously we're going to do we need to be careful of this area here this particular area here underneath is the fuel tank so we don't want to be drilling down with a massive long drill (01:28) bit and going into our fuel tank that'll be an after disaster, so we've only got very short screws and we're going to use a short drill bit and just be very careful once you've gone through the wood and you're going through the metal you need to go very slowly cut the metal only because you could go into either a fuel line, or the fuel tank would be a nightmare. As I said before, we need to pay special attention to this area because our field tank is right below, so we're only going to pick out a few spots to fix this side of the floor (02:15) because this is the larger part of the wood we probably don't need as many fixings so we'll start let's start with this corner on here i think by the step we're gonna fix it and then we'll do a couple in the middle we should be good just throw our wood and now we need to be careful going through the metal part of the floor there we go and we're through so we can get one fixing in there by hand with the screwdriver first and then we can get our bit on our screw on our drill afterwards once we've got a few more drilled (02:56) just make sure that that's yeah it feels good excellent okay let's get a few more drilled this is our vinyl flooring that we've laid over the top of our plywood this is a very heavy duty vinyl it's used in most sort of campervan conversions so what we've done we've bought this and this is actually pre-cut although it's not perfect so we've had to do some trimming around the edges to get it to sit really nice but it's a good start as you can see that side is still a little bit large but we're going to work our way over (03:34) there and then trim that as well so we're going to start at this side as you can see we've had it laid down it's nice and flat i'm going to peel this edge back sort of about a quarter of our size of our floor and put our adhesive down now we're using the contact adhesive so that means we put adhesive on both parts so we're going to put it on the bottom of the flooring and onto the wood and then as it goes together it should contact but you have to let it go tacky so we're going to crack on with that we're going to get this first side done (04:03) and then move across and then i'll show you how to trim the other side so we can use a contact adhesive with a brush appliance it is pretty smelly so it's recommended to use it in a well ventilated area or use a mask i'm going to put mask on [Music] [Music] the glue has now sort of gone off is touch dry on both surfaces so we're going to start working it back nice and gently so we don't get any air bubbles as you see i'll take this a little bit here okay so we're just gently going to roll it back should sort of sit back into its (04:55) original position where we've had it laid out for a little while again you just need to take your time be patient some of these floor vinyls can be really rough so it might be a good idea to wear gloves if yours is particularly rough this isn't too bad it's got quite a nice non-slip surface but it's not too too rough so i'm just going to work the last corners in with our little magic wooden tools this is the same tool we use for doing the carpeting just allows you to as you can see i've got a little bit of that lino to push in (05:48) okay so that's this part stuck we're now going to roll the vinyl back this way and stick the other side as you can see we've rolled the non-glued part of the vinyl back over the top of the part that we've just glued and now we can start working back this way so we're going to work in sections of that size so it's basically i'm going to come to here with our glue there with our glue and then we'll do the last section before we have to trim the edges our next step is to get the vinyl fitting in this corner really nicely as(06:30) you saw before there was a little bit of oversize on our vinyl mat that has been pre-cut so we're just trimming it for perfection so the easiest way to do that is i've got a hot air gun you can use a hair dryer anything just to soften that vinyl a little bit so give it a little bit of heat obviously don't go too far because you want to burn it you don't want to burn your carpet so we lift it away and just gently put some heat through the corner where you where you want to push it into now once we've got some warmth into our(06:58) vinyl i use my little magic wooden tool and then we push that vinyl into the corner and then you can actually see a line of where we need to cut and we just mark above that and trim it and then try it and then we can just trim a little bit at the time so you don't want to trim too much off in one hit so again handy use of a marker and then we've got our sharp scissors to cut the vinyl with and then once we've got that corner perfect then we can move on and move all the way down and trim the rest of it and then glue our last bit.(07:32) So as you can see that's the floor glued down all in position and trim both sides, i think it looks really good now, so we've got great all the way around. I've got a lovely grey floor carpeting, looks really good the roof looks really good
  • How To Get Your Classic Car Ready For A MOT

    How To Get Your Classic Car Ready For A MOT

    Mark goes over the stuff you need to check before taking your classic car to the MOT Center. (00:00) Welcome to Just Kampers and it's MOT time for Ruby here. We're just going to carry out a few little checks before we take it to our local testing station. A quick tire check, make sure they're inflated correctly and there's no signs of obvious damage on the sidewall or across the tread, and also make sure we've got plenty of depth of tread. Next I'm going to check that all the lights work on the front, so that's our side lights, our dip beam, our main beam and our indicators. I can do that on my own, don't need any help with the rear lamps (00:31) however you may need somebody to help you with the brake lights when checking the rear lights don't forget to check all important number plate light quite easily forgotten about also double check that your number plates are secure front and rear then have a quick check of your windscreen make sure it's clean and free from chips also we need to make sure that our wiper blades are intact and they're not split and falling apart and they're going to do the job make sure the washers work carrying out our exterior checks just double check (01:05) your mirrors are tight and they're not broken then a quick check under the engine bay to make sure we haven't got any excessive oil leaks from anywhere make sure everything's secure and in its place and double check our fuel Pipes make sure they're all clipped in position and that we haven't got any leaks from our fuel pump area or our carburetor area lastly I like to just double check the oil level once we're inside the car we need to make sure that our sun visors work correctly and they stay up and they don't flop down in front of your face (01:37) both sides obviously double check that your rear view mirror is secure and you can see through it make sure you can open all your doors from inside make sure the inside handle works don't forget to try the horn we need to make sure that our seats are secure and if seat belts are fitted that they work obviously there's only a few things that the mot tester is actually going to test and check but it's a good start for us you don't have to be a mechanic to be able to present your car with everything working so I think it's time to get down there (02:12) and see how we get on you see Ruby is parked up ready to go into the testing station what do we have here positive perfect thanks to the guys at Charles's garage that's this 1967 Beetle Cabrio mot'd for another year [Music] back from mot with the 1967 Cabrio all went well apart from one little thing a little bit of a Schoolboy error I forgot to put water in the washers luckily add a bottle of water with me job done even though this 67 Cabrio is mot exempt it still gets mot'd every year the immortine classic cars is something (02:58) I recommend highly just for safety, for your safety and other Road users, but that's Ruby mot'd for another year. Thank you so much for watching. We will see you next time 
  • Check out our range of Stainless Steel Exhausts

    Check out our range of Stainless Steel Exhausts

    Mark shows why you should buy one of our stunning Stainless Steel Exhausts
  • T2 Bay mirror upgrade - Auto Wares Convex Mirrors

    T2 Bay mirror upgrade - Auto Wares Convex Mirrors

    Upgrade your T2 Bay mirrors with Auto Wares Convex Mirrors.
  • How to fit a leisure battery to your VW T6 Transporter

    How to fit a leisure battery to your VW T6 Transporter

    Mark, JK's Mechanic, shows us how to fit a leisure battery into a VW T6 - T6.1 Transporter.How to Fit a Leisure Battery System to Your Camper Here’s another handy guide from Just Kampers, showing you how to instal a leisure battery system to your campervan.  If you’re looking to upgrade your camper's electrical with a secondary circuit and leisure batter, then this guide will show you how quick and easy it can be. We'll walk you through the process of fitting a leisure battery and a 12-volt system in your campervan, ensuring a safe and efficient setup for all your adventures. Step 1: Choosing the right location The first decision you'll need to make is where to install your leisure battery. T Typically, campervans offer two main locations: underneath the passenger seat, or under the driver's seat.  You can fit your leisure battery almost anywhere that has the space, but make sure that you don’t instal it anywhere that it might be knocked or bumped, which can cause damage to the battery and the wiring and cause real issues.  Consider things like available space, ease of access, and any modifications you've made to your seats or other areas of your campervan.  In the case of our project, we opted for fitting the leisure battery under the driver's seat, since we had a swivel base installed on the passenger side. Step 2: Preparation and placement Once you know where you’ll be placing your leisure battery, it's time to prepare the area.  You’ll need a stable platform, such as a wooden plinth, to support the battery and ensure it's securely positioned. Take measurements to ensure the terminals remain below the seat base to prevent any short circuits. Step 3: Wiring and connection Now comes the crucial step of wiring your leisure battery to the vehicle's electrical system.  Begin by running the main feed cable from the van battery to the leisure battery. Carefully route the cable through existing grommets and channels to maintain a tidy and waterproof connection. Step 4: Safety measures When working with electrical components, safety should always be a top priority. Take precautions such as disconnecting the negative side of the battery before handling any live wires to prevent accidents or short circuits. Secure all connections and use appropriate fuses to protect against overloads. If you’re in doubt about anything you need to do at any stage, it’s best to check with a certified electrical specialist to make sure that everything is done correctly and safely.  Step 5: Integration and testing With the wiring complete, it's time to integrate additional components like a split charge relay and fuse box for the 12-volt system.  These components will help make sure that the leisure battery is charged correctly and safely, while preventing drain on the vehicle's battery when not in use.  Test the system to verify proper functionality, including lights, USB ports, and any other accessories. Step 6: Final checks and adjustments Before wrapping up the installation, perform a final inspection to ensure everything is securely in place.  Strap down the leisure battery and any additional components to prevent movement during travel.  Double-check all connections and tidy up any loose wiring for a professional finish. Step 7: Enjoy!  With your camper's electrical system now successfully upgraded, it's time to hit the road and enjoy all the comforts of home on your next adventure! Whether you're camping off-grid or road-tripping to your favorite destinations, you can now rely on your leisure battery to keep your essentials powered wherever you go.Products Seen in This Video{{widget type="Magento\CatalogWidget\Block\Product\ProductsList" template="Magento_CatalogWidget::product/widget/content/grid.phtml" anchor_text="" id_path="" show_pager="0" products_count="5" condition_option="sku" condition_option_value="J46687" type_name="Catalog Products List" conditions_encoded="^[`1`:^[`aggregator`:`all`,`new_child`:``,`type`:`Magento||CatalogWidget||Model||Rule||Condition||Combine`,`value`:`1`^],`1--1`:^[`operator`:`()`,`type`:`Magento||CatalogWidget||Model||Rule||Condition||Product`,`attribute`:`sku`,`value`:`J46687`^]^]" sort_order="position_by_sku"}}Did you know that our colleagues at Just Kampers Insurance have been offering specialist vehicle insurance since 1998?You can get a great deal on insurance for a huge range of vehicles, from daily drivers to treasured campervans, and everything in between. Just Kampers Insurance works with a huge network of insurers to find you the best deals, and they're so confident that they'll send you a £50 Just Kampers gift voucher if they can't beat your like-for-like quote! Insuring your vehicle with Just Kampers Insurance also gets you a 10% discount on orders here at Just Kampers, which could save you even more money!Get an Online Insurance Quote Today{{widget type="Magento\Cms\Block\Widget\Block" template="widget/static_block/default.phtml" block_id="232" type_name="CMS Static Block"}}
  • JK Guide: How To Remove Ply Lining

    JK Guide: How To Remove Ply Lining

    Mark shows us how to remove Ply Lining(00:00) Welcome to Just Kampers Project 2022. So this is a t 6.1 transporter that we're going to be converting from a panel van into a full-on camper so our part one is removal of all of our ply lining and our bulkhead and then we're going to start with a bare basic vein so we're going to start by removing our panel work that's been put in by the dealership so we're going to remove all this so we can see what we've got and start with our bear van okay so you can either use a screwdriver or if you have one it's really handy to use a battery operated (00:33) drill to remove the screws just shortens our time also, as this wheel arch box is sealed together, we can use a knife to hopefully break the sealer away all the way down, so we should be able to remove the box as one section, and that should just break away freely wow, okay, so it's getting pretty chilly in the workshop. I think we're gonna have to change over to the warm jumper, let's get rid of that one as if by magic, that'll do perfect, okay, we'll just continue (01:36) okay so we're going to unscrew all the screws for the side panel, remove the side panel now, okay, should be all the screws removed. So obviously again there is sealer that's between the two plywood panels, so we need to cut that with our knife should just to be able to lift it, okay, so these factory holes here (02:45) on these panels to help us close the tailgate and allow for air movement so again we need to make note of that um so we're going to remove this, that's our 3mm allen key, wind out in the center then we can pull the whole thing out in one so i did the last few without even using the allen key just the trim tool there we go that's our panel removed okay so the pull down strap on the tailgate is actually screwed in with torx screws so we need to unscrew those those torx screws are a T25 so you can use either just a T25 screwdriver i've (03:25) got like a multi tool here same thing this is basically we can unscrew so that's that's the torque set uh torx screw um it looks like a star and that's a T25 both screws are out next thing we need to remove with a bit of care is our electric button that opens the rear tailgate um so again we need to unplug this and pop this out of this panel so we'll do that by dropping the tailgate back down okay so we've got to remove this switch from this panel this is our switch to open our tailgate so we have to be careful this because (04:02) obviously it's plastic there is a little plastic tag underneath but basically we push up with our finger and then the switch pops out and as we pull the switch out we can turn it over and remove the electrical plug and then basically that's it out of our panel the only other bit to come out is this again the pegs behind we squeeze and we take the trim okay cool [Music] the next part is to remove the floor ply lining these are all screwed down to the body again so we use our drill to remove all our screws first things first we need to remove (05:00) the jack so we can pull our plier lining out and this just literally unscrews and then we'll decide where we're putting him later once we've finished our conversion because we probably have to remove this mount once we've removed this mount to be able to continue with our conversion we'll end up putting the jack probably under the passenger seat in the front with all the other parts so one half of the floor yeah that's it headliner or the the headboard so we're going to take this out much the same fittings as our side panels were so we're gonna (05:54) use our either our 4mm uh 3mm  allen key, and obviously, we've got the trim tools as well if we need it, so let's crack on once the centre bit's removed. We can now pull down our panel, so all our panel is removed. We're gonna clean out the back of the van, so uh I was gonna use my mate Henry but he's away, it's all right though, because we've got Charles!
  • How to remove the bulkhead from your VW T5 or VW T6 Transporter

    How to remove the bulkhead from your VW T5 or VW T6 Transporter

    Mark our JK Mechanic shows how to remove the bulkhead from your VW T6.1 Transporter. How to Remove the Bulkhead in your VW Transporter We’ve put together this helpful guide on removing the bulkhead from your Volkswagen van. If you’re working on transforming your VW into a camper, then removing the bulkhead is a huge step towards getting everything ready, and totally transforms the look and feel of your van, but it can be a pretty daunting job. Luckily, it’s not as difficult or intimidating as it may seem, and we’re here to guide you through the steps you’ll need to take to get the job done safely and quickly. Step One: Get your tools ready Before you start, gather up all the necessary tools and equipment:Trim tool or flat-bladed screwdriverT30 screwdriver22mm socket and ratchet16mm socket and spannerNumber 10 spline toolDrill with appropriate bitsAngle grinder with cutting disc and soft pad flapper wheel grinding discSafety equipment: goggles or face mask, ear defenders or plugs, metalworking gloves Step Two: Removing the bulkhead Start by removing all the 10mm nuts and securing the top of the bulkhead using a ratchet. You’ll need to remove the plastic trim from the remaining fixings using a trim removal tool or screwdriver, before taking the nuts themselves off. Once all fixings are removed, you can carefully lift and remove the top half of the bulkhead and set it aside somewhere out of the way. Repeat the process for the bottom half of the bulkhead, ensuring all fixings are removed. Step Three. Removing seatbelts and trim Soon we’ll need to start grinding and cutting, but before we do that we’ll need to remove the seats and seatbelts from your Transporter’s cab, so they don’t get damaged or get in the way. Use a number 10 spline tool to remove seatbelt fixings, and remove the trim pieces and seatbelt covers using a trim tool or screwdriver. Disconnect electrical connections for seats and remove any remaining fixings securing the seats in place, then gently lift and remove the seats from the vehicle. Step Four: Grinding and cutting With your safety equipment on, carefully use an angle grinder with a cutting disc to cut through welds where the bulkhead lip meets the floor.Take your time and cut sections at a time to avoid damaging surrounding areas.Use a screwdriver or lever bar to stretch the metal and help with cutting.Switch to a soft pad flapper wheel grinding disc to grind away any remaining welds and smooth out edges. Step Five: Protecting the bare metal: Once all grinding is complete, clean the area thoroughly with a vacuum to remove any grinding particles and other debris. With this all done, and the area thoroughly cleaned up, apply a direct-to-metal paint to cover bare metal surfaces and prevent corrosion. Congratulations! You've successfully completed a major stage of your van conversion project!{{widget type="Magento\CatalogWidget\Block\Product\ProductsList" template="Magento_CatalogWidget::product/widget/content/grid.phtml" anchor_text="" id_path="" show_pager="0" products_count="5" condition_option="sku" condition_option_value="J42767, J42766, J29560, J29557" type_name="Catalog Products List" conditions_encoded="^[`1`:^[`aggregator`:`all`,`new_child`:``,`type`:`Magento||CatalogWidget||Model||Rule||Condition||Combine`,`value`:`1`^],`1--1`:^[`operator`:`()`,`type`:`Magento||CatalogWidget||Model||Rule||Condition||Product`,`attribute`:`sku`,`value`:`J42767, J42766, J29560, J29557`^]^]" sort_order="position_by_sku"}}Did you know that our colleagues at Just Kampers Insurance have been offering specialist vehicle insurance since 1998?You can get a great deal on insurance for a huge range of vehicles, from daily drivers to treasured campervans, and everything in between. Just Kampers Insurance works with a huge network of insurers to find you the best deals, and they're so confident that they'll send you a £50 Just Kampers gift voucher if they can't beat your like-for-like quote! Insuring your vehicle with Just Kampers Insurance also gets you a 10% discount on orders here at Just Kampers, which could save you even more money!Get an Online Insurance Quote Today{{widget type="Magento\Cms\Block\Widget\Block" template="widget/static_block/default.phtml" block_id="232" type_name="CMS Static Block"}}
Page