


We’ve put together this quick and helpful guide to help you make sure your vehicle is ready to hit the road once the winter is over, whether you’ve had it tucked away over winter or you’ve kept it on the road.
Cars can go through a lot over the winter months, with iffy driving conditions, bad weather, salt and snow on the roads, and more, and even if your VW has been stored away for hibernation like a Blue Peter tortoise, it can still emerge in spring looking a little worse for wear.
That’s why we’ve created this guide, to give you a list of things to look at and areas to check, to make sure your vehicle is in great shape once the weather turns and spring arrives.
What to check on your vehicle after winter
We’ll start off with a nice, easy step to get going with, and work on from there.
Give your vehicle a good once-over
It’s best to start off with a very low-tech visual inspection when you’re checking up on your VW after winter. No one knows your vehicle as well as you do, so have a proper look around and see if anything looks amiss.
Is there an oil leak underneath? Are any of the tyres flat? Is there moisture on the insides of the windows? Do the seats look like they’ve been chewed by mice?
These are all great places to start, especially if you’ve got an older Volkswagen which you’ve had stored over the winter without driving it much (if at all).
Check out the interior
As we mentioned above, you may find that mice or other rodents have gotten into your vehicle’s interior and gotten up to no good. Cables, wiring, and hoses are sometimes chewed on by rodents, who have to keep nibbling things to wear down their ever-growing teeth.
Older vehicles also use ‘horse hair’ padding in the seats (which is actually made of coconut fibres) which rodents may borrow to create nests. It’s also not unheard of for them to just make nests inside your seats!
It’s also worth looking for moisture inside your vehicle, either on the insides of the windows or pooled underneath them. This could be a sign that a seal (or several) needs to be replaced as they’re leaking. If you're struggling with moisture building up inside your VW, it's probably worth investing in a moisture trap, which will catch it before it causes problems - just remember to empty it out regularly.

How to check for rust on your Volkswagen
Rust can be a real problem in a lot of older vehicles, but it can affect newer ones too, especially with the combination of road grit, water, mud, ice, and other causes of corrosion which are so common during the winter months.
If you can safely lift your vehicle off the ground and keep it secure, you’ll have a much easier time doing this, but whether you slide underneath yourself, employ a cunning series of mirrors, or just use your phone’s camera to record a video of the underside of your vehicle, it’s definitely advisable to get a good look under there and see if you can spot any patches which might be suffering from corrosion.
We always recommend applying underseal or rustproofing to the underside of classic VWs (a job which is easier to do in the summer while it’s warm), to help prevent rust and corrosion from taking hold, but even with this precaution it’s still worth checking the underside of your vehicle.
Don’t panic if you do find rust, it’s not the end of the world. See if you can get to the affected area for a proper look and (gentle) poke around, to help assess the scale of the issue. It might be treatable with a product like Rust Eater from Noxudol, or you may find that a section or two of metalwork need to be replaced, but it’s all treatable and it’s best to find out early so you can act on it.
Look for tyre damage
While you’re down at ground level checking things out, the next step is taking a look at your vehicles tyres to check for any damage they may have sustained over the winter.
If you’ve been driving your VW through the winter, they may have become damaged without you realising as there’s usually a lot more debris on the road and it’s often covered up by mud or snow on the road.
Potholes are also more prevalent (and larger) in the winter as the freeze-thaw effect we all learned in geography class cracks apart our roads. These can cause damage to both your wheels and tyre, so it’s important to check them over and look at the tread as well as any signs of damage and the general condition.
If your VW has been parked up over the winter, then you’re not necessarily free of damage and it’s still definitely worth checking whether your tyres have developed flat spots from being parked up in one place for a while.
You might find that they’ve let some air escape during their winter hibernation, so reinflate them as necessary and keep a close eye on the pressure for the next few weeks. If they’re really flat, then you’ll want to check the tyre for damage, holes, or rips which are letting the air escape and then get it repaired or replaced before taking on any long drives.
Check and test the brakes, refill brake fluid
Again, this is easier to do if you can safely lift your vehicle off the ground and set it on axle stands, but you’ll also want to take a look at your brake system after the winter, especially if you’ve had your VW stored away.
Some of the brake hoses used in our vehicles are made of materials which are apparently irresistible to mice, in a phenomenon which has become known as ‘rodent abuse’ here at Just Kampers, after our on-site mechanic ‘Workshop Mark’ used the phrase in a video.
Flexi hoses are a particular favourite, so they’re definitely one to take a look at while you’re inspecting your brakes.
If you can access the brake pads and brake drums/discs, make sure that these are in good condition and aren’t worn down too far – better to replace them now than to find out they’re no good while you’re on the way to your first VW show of the season!
It’s also important to check your brake fluid levels, and to ensure that they’re still working correctly and haven’t seized in place. If they are stuck, a little gentle persuasion with a hammer is often enough to loosen them up.

Check the wipers, windscreen, and washers
Time to get up off the floor and take a look at something a little higher up – your windscreen, wipers, and washer system!
Are your wiper blades in good condition, and are they doing a decent job of clearing your windscreen? The rubber can begin to perish over the winter due to the poor weather, so now is the time to fit new ones if they’re no longer working properly.
You should also take the time to have a proper look at your windscreen itself, and check for any chips, cracks, or other damage which may have sprung up over the winter.
We recommend that if you’re storing your VW for the winter, you slip an old cloth or something similar under each wiper blade to prevent them from causing any damage while they’re parked up, so be sure to remove these if you haven’t already!
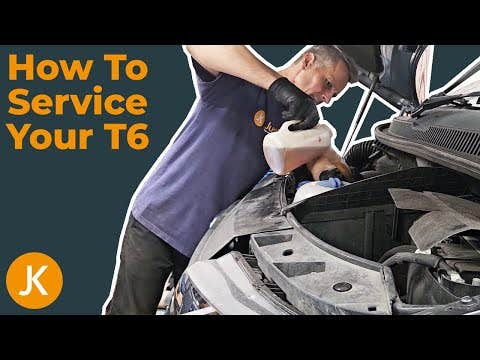
Engine service
Now for the fun part, which isn’t nearly as intimidating as it looks – servicing the engine.
You can do this on the engines of classic or modern Volkswagens relatively easily, and we’ve created a couple of how-to videos to show you the areas to take a look at.

If you feel comfortable taking on the engine service after watching how, then take your time and work through each step one at a time. Books like the John Muir ‘Idiot’s guide’ to Keeping Your Volkswagen Alive, or our own Kamper Manuals, also have loads of great information in them to help you through the process.
Alternatively, if you don’t have the time, skills, or experience to take on the job yourself, there’s sure to be a local garage near you who knows what to look for, especially on older Volkswagens.
To help people to take the job on themselves, we’ve created a range of money-saving service kits, which contain all the parts you might need during an engine service. If you don’t need to replace them while you’re servicing the engine, then you can store them away as spares or add them to a breakdown kit that you carry with you in your vehicle.

Check your oil
Whether you’re doing an engine service yourself, or taking it to an expert, you should check your vehicle’s oil levels.
If you’ve been storing your VW over the winter and find you’ve somehow gained oil, it might be that your fuel pump has leaked into the sump.
If you’ve lost oil, you’ll likely find it in a puddle underneath your vehicle!
Top up your fluids
Adding in fresh fuel and refilling your brake fluid and washer bottle are quick and easy, but the latter two are easy to forget. Best to get it all done at once while you’re getting your vehicle ready to hit the road, before you run into problems on the way to your first VW show of the year!
Reconnect and test the battery
With all of this done, it’s time to take a look at your battery and make sure it’s still in good shape.
Some older VWs like the T2 Bay have a bit of an infamous habit of leaking battery acid, which then corrodes the battery tray located to the side of your engine. Gnarly blueish crystals forming on the terminals, or damaged metalwork under your battery, are a sign that your vehicle’s battery might be due a replacement.
All automotive batteries have a fixed shelf life, so try to think when yours was last replaced and whether it might be nearing the time to consider a new one. Your vehicles battery is a fairly major component, and having it give out on you is a massive inconvenience, even if it is relatively simple to fix.
If you’ve disconnected your VW’s battery because it’s been in storage for the winter, then it shouldn’t have lost too much juice since then. Carefully reconnect it, and skip right on to the next step.
Cold weather, or not disconnecting the battery before storing your VW, might lead to a flat battery, but you can purchase vehicle battery testers relatively cheaply which will help you diagnose the problem, as well as chargers to top them back up.
If a flat vehicle battery is a recurring problem for you, then consider a simple fix like a solar trickle charger, which will keep it topped up with no hassle.
Check and test your lights
Now that your vehicle battery is all sorted, it’s time to give your lights a good check.
A proper test of all your lights is quick, easy, and vital for keeping you safe on the roads.
Check your headlights, side lights, full beams, indicators, hazard lights, tail lights, brake lights, reverse lights, and fog lights. If any of them have stopped working, check the fuse box and the bulbs – hopefully it will have been one of these which has blown, rather than mice getting into your Volkswagen and feasting on those delicious wires!
If you don’t have someone nearby who can tell you whether these lights are working as you test them, you can set your mobile phone up nearby and film a video as you go through and test each set of lights, front and back. It won’t be the most exciting footage to watch, but it’ll help you spot any lights which might have failed.

Start it up
Alright, it’s finally time to start your vehicle up! If you’ve driven it throughout the winter then this probably won’t be a very dramatic moment, but it’s a great feeling for anyone who has stored their classic VW or campervan away for the winter.
It might take a moment for your Volkswagen to get going when you try to start it up after a winter spent hibernating. This isn’t a bad thing, as it’ll give the oil a chance to work its way around the system.
You could also disconnect the main HT lead from the coil before starting the engine up for the first time, to let the oil work its way around without the spark plugs igniting, if you want to give your engine some extra time to get everything flowing again. Do this for about 20 to 30 seconds, then switch the engine off, reconnect the HT lead, and fire her up again.
The carburettors will also need to refill with fuel before the engine fires up, so don’t panic if it takes a bit longer than normal!
Take it for a test run
Now for the fun part – hit the road for a test drive! You don’t have to do this immediately if you’ve not got the time after running through all of these checks, but a good drive after the winter can help to identify any problems with your vehicle, or just those little things you’d like to fix before your next big road trip!
If you’re feeling unsure about how well your vehicle is doing after being stored for a few months, see if you can get someone to drive along behind you in case you do break down, or maybe do a lap of a few of the roads closer to home – you neighbours might think you’ve somehow managed to get lost, but at least you’ll be near to home if something does go awry.
Give it a good clean
This bit is arguably less fun, but it’s really important to give your vehicle a thorough clean after the winter to get any road salt, mud, and other ‘stuff’ out from those nooks and crannies underneath the vehicle and off the bodywork.
A good wash is an important step whether you’ve had your Volkswagen in storage or you’ve driven it all winter long, as no vehicle will enjoy being lightly encrusted in grit and mud for longer than it needs to be.

You’re ready to go!
That’s it, with these key areas checked and tested, a trial run completed, and a good wash all sorted you’re ready to hit the road in your VW!
Where will you be taking it to? Well, if you’re stuck for some inspiration then take a look at our 2024 calendar of VW shows and events and get some inspiration.
There’s a massive amount of cool stuff happening this year, and we’re excited to get out there and enjoy it right alongside you, whether ‘officially’ as Just Kampers, or just as visitors there to enjoy the show.
About this guide
The steps in this guide are intended to give you a great start to enjoying your vehicle once the summer is over, and should allow you to spot most major issues with your vehicle which may have developed over the winter months, but it isn’t an exhaustive list.
You’ll find more information about how to perform some of these checks in the how-to videos on our YouTube channel, or in the different fitting guides here on the Just Kampers website.
About Just Kampers
We’ve been part of the VW community since 1989, and are here to help with all sorts anything you might need for your Volkswagen.
Over the years we’ve evolved from a tiny repairs workshop to a leading producer and supplier of parts and accessories for Volkswagens and converted campervans. Our colleagues over at Just Kampers Insurance have been helping people get tailored vehicle insurance policies for their campers (and a whole range of other vehicles) since 1998, too.


